Pollution has been a recurring red flag on the environment radar. And noise pollution is a massive part of it. So for a better lifestyle, soundproofing your interiors is the way to go. The present market offers an enormous variety of options. Between soundproof curtains and mass-loaded vinyl, the possibilities are endless. But let us be realistic. More often than not, we find ourselves in situations where we need to use whatever is handy. Installing drywalls or foam panels can be time taking and expensive. Soundproofing tapes can work like magic for a more economical and quick fix. For more unique and space-efficient soundproofing tips, check out our guide on Small Space Soundproofing Tips.
Table of Contents
How Does a Soundproofing Tape Work?
Sound deadening tapes reduce the transmitted vibrations. Made of rubber and foam, they can dampen the sound waves pretty efficiently. They can be applied to the smaller gaps and cracks in the structures. The tape will help to prevent noise from entering from the outside. With the air pockets being closed, you can maintain the noise level inside the room at the desired level. The metal bars and rods that form the basic structure of most of our constructions are another major media that is a good conductor of sound waves. These tapes also absorb many vibrations traveling through them, enhancing the entire experience. Discover 10 Innovative Ways to Integrate Smart Home Soundproofing Solutions for a quieter environment.
The tapes are like regular adhesives. You can use them on drywalls and ceilings even to ensure a more air-tight space. Usually, soundproofing tapes are implemented as a part of expansive undertakings for superior noise insulation. However, if you want a stop-gap solution to immediate noise-related issues, sound deadening tapes can also be a great help. Simply applying the tapes to the sources can also produce surprising results.
Types Of Soundproofing Tapes
At present most hardware stores sell chiefly four different kinds of soundproofing adhesives. Since the tapes are applied at the edges and brims to block out as much sound as possible, you must choose a compatible type with your infrastructure. They are generally used on acoustic tiles, foam panels, and furniture structures. However, sound damping tapes can also be utilized to improve noise cancellation inside your cars and automobiles. And this is probably one of the biggest perks of good deadening tape. They are convenient and very effective.
The commonly found types are as follows:
● Acoustic Foam Tape
Polyethylene or EPDM is the primary constituent of acoustic foam tapes. They are significantly thicker and can be used on edges as they are flexible. From theaters to your home’s garage, you can widely use them in multiple different settings.
● Soundproofing Tapes
They are thinner in diameter than the foam tapes. The most difficult cracks and seams, especially those in narrow spaces, can be quickly closed up with soundproofing tapes. They perform exceptionally well when enhancing the performance of other soundproofing articles, like MLV panels and walls.
● Membrane Sound Deadening Tapes
These tapes are made of synthetic fibers, and membranous sound deadening tapes are specially designed for metallic surfaces. They can be applied directly to the structures themselves. You have to peel them off from the package and stick them on the adhesive. These tapes are adept at absorbing most of the vibrations transmitted through steel rods and beams inside the walls. They are particularly effective in conference halls and air conditioner rooms with open metal frames and similar exteriors.
● Weatherstripping Foam
Initially designed to keep bugs and dust, weather stripping foam tapes can provide excellent insulation if you know how to use them. They are way cheaper than the other available options and significantly bring down the noise level. The performance isn’t as outstanding as acoustic panels and membrane tapes. But since they also protect from particulates and pests, they are worth the investment.
Learn more about enhancing your soundproofing efforts with High-Density Soundproofing techniques.
Best Tapes
Up until now, we have discussed how beneficial soundproofing tapes can be? We have also talked about their multipurpose application. However, now comes the most crucial bit. As you know, the diversity in the available products is pretty great. Moreover, it might get very confusing if you are not familiar. To reduce your troubles, here’s a list of the best sound deadening products that even a non-specialist can handle. For a complete soundproofing setup, consider integrating Soundproof Rug Pads: Features, Benefits, Installation.
1. Noico Tape Finishing Sealing Tape
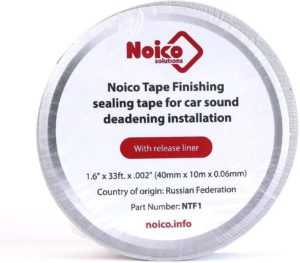
These tapes are manufactured by Noico Solutions and are one of the most popular soundproofing tapes. The most significant advantage of this product is that they are waterproof. So even in places like plumbing and kitchens, where dampness is an issue, these tapes are very effective. However, they do not work against heat and should be kept away from air conditioning setups.
2. HushMat HSM30300 1″ x 20′ Quiet Tape Shop Roll, Regular
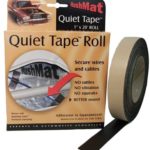
The HushMat quiet tapes are available on most online platforms. They are super easy to install and can fit into fragile spaces. They can also be applied on wires and other open metallic surfaces. Most interestingly, they have high thermal insulation that ranges from -30℉ to 300℉. So you can use them in motor rooms and vehicles as well.
3. Design Engineering 050215 Boom Mat Damping Tape
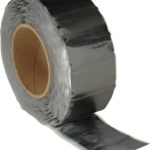
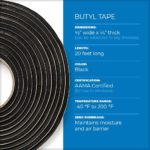
These Design engine damping tapes can be used in multiple different locations. Since they are thin in diameter, they are beneficial in wirings and restricted areas like floorboards. The tape is made of butyl rubber; the soundproofing tapes can be applied on vents and ducts in the plumbing lines and drainage system.
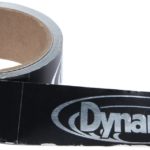
4. Dynamat 13100 Dynatape
The Dynamat tapes are mainly designed for automobile interiors. They are narrow so that they can be easily applied to the thinnest of the spaces. Plus, these tapes come cheap for 8 dollars per 1-meter roll of the tape.
National Consumer Center offers you a chance to get a $500 gift card to Amazon. The payouts are quick, and you can use the Gift Card to pay for some of your Amazon products.
5. Second Skin Butyl Sealant Tape
First off, this might seem like it’s costly, but the Second-Skin butyl tapes are an excellent investment. They are of a superior grade in quality and are excellent noise dampers. They are heat resistant, waterproof, and also have high thermal insulation. Most importantly, these tapes can be applied over metal, wood, plastic, and even glass surfaces. You can use them both in a domestic and an automobile interior.
How Do We Apply The Soundproofing Tapes?
Applying sound deadening tapes is simple. They come in rolls and can have the sticking materials on either one side or both sides. Since the adhesive dries up quickly, you should peel off the backing right before applying the tape. So make sure that you have all the places where you want to apply the tapes figured out before beginning the soundproofing process. Since we don’t want any hidden gaps, you can use a cloth to clean up the regions before. This way, no mold or dirt will be able to clog up the openings. If you are using some cleaning agent, ensure that it dries up completely before putting it over the adhesives. If you feel like repainting for a better finish, it’s recommended that you wait for at least a day so that the glue can stick firmly.
| Tape Name | Waterproof | Thermal Insulation | Application Areas | Price |
|---|---|---|---|---|
| Noico Tape Finishing Sealing Tape | Yes | No | Plumbing, Kitchens | Varies |
| HushMat HSM30300 1″ x 20′ Quiet Tape Shop Roll | No | -30℉ to 300℉ | Motor rooms, Vehicles | Varies |
| Design Engineering 050215 Boom Mat Damping Tape | No | N/A | Wirings, Floorboards | Varies |
| Dynamat 13100 Dynatape | No | N/A | Automobile Interiors | $8/m |
| Second Skin Butyl Sealant Tape | Yes | Yes | Metal, Wood, Plastic, Glass | Higher |
Conclusion
So now that we have come to the end of this article, we hope that it was helpful and could clear up your doubts to some extent. Which would be the tape of your choosing? Try out and let us know how it worked out!
Sound travels through the sheet metal surfaces in your vehicle. Your floor covers the bulk of this. Sound damping this area will significantly reduce noise traveling through your car.
I’ve gathered this information by researching many different sources of information. Sometimes it isn’t easy to find helpful information, but I’m sure you’ll find this useful.
- Firstly remove the front and back seats, the center console, and the floor carpet of your car
- Then prepare the surface area
- After that, apply Dynamat
- Finally, reverse the steps of removal
Installing Dynamat on the floor of your vehicle will
- reduce engine noise
- reduce wind noise
- extend and improve the performance of your vehicle
- improve your car audio sound system (less noise for your car speakers to contend with)
The process for removing the carpet varies from vehicle to vehicle, so I’ve just looked at the most common setups. You’ll need to check your specific vehicle’s user manual and scrutinize the areas yourself.
You should check your car’s manual first. For around $20, you can find a detailed version. The easiest way to find the hard copy repair manual for your vehicle is to select Repair Manuals by Make and Model. Or you can get an electronic version. They both have all sorts of instructions and guides, whether it’s for customization, maintenance, repair, or even simply just learning about the inner workings of a particular vehicle.
What you’ll need
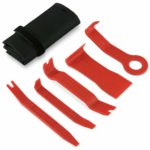
A panel removal tool kit is required for the panel pins. This is because they avoid breakage of the pins during the removal of them. It’s also useful for prying away the panels without doing damage to your vehicle’s paint job.
Aluminum tape is also needed. You can patch up the parts where there might be gaps left or use the tape to give your application a clean finish.

Wear a good pair of workman’s gloves while working with the material. The foil edges are sharp and cut through your skin. The glue is also best avoided.

You can use metal shears instead of scissors for products like Dynamat and others. You can also use a switchblade.
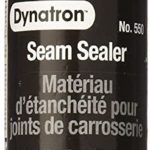
Use the correct seam sealer (if required) to avoid it setting and causing ripples on your trunk lid. In addition, the seam sealer should maintain some flex when dries.
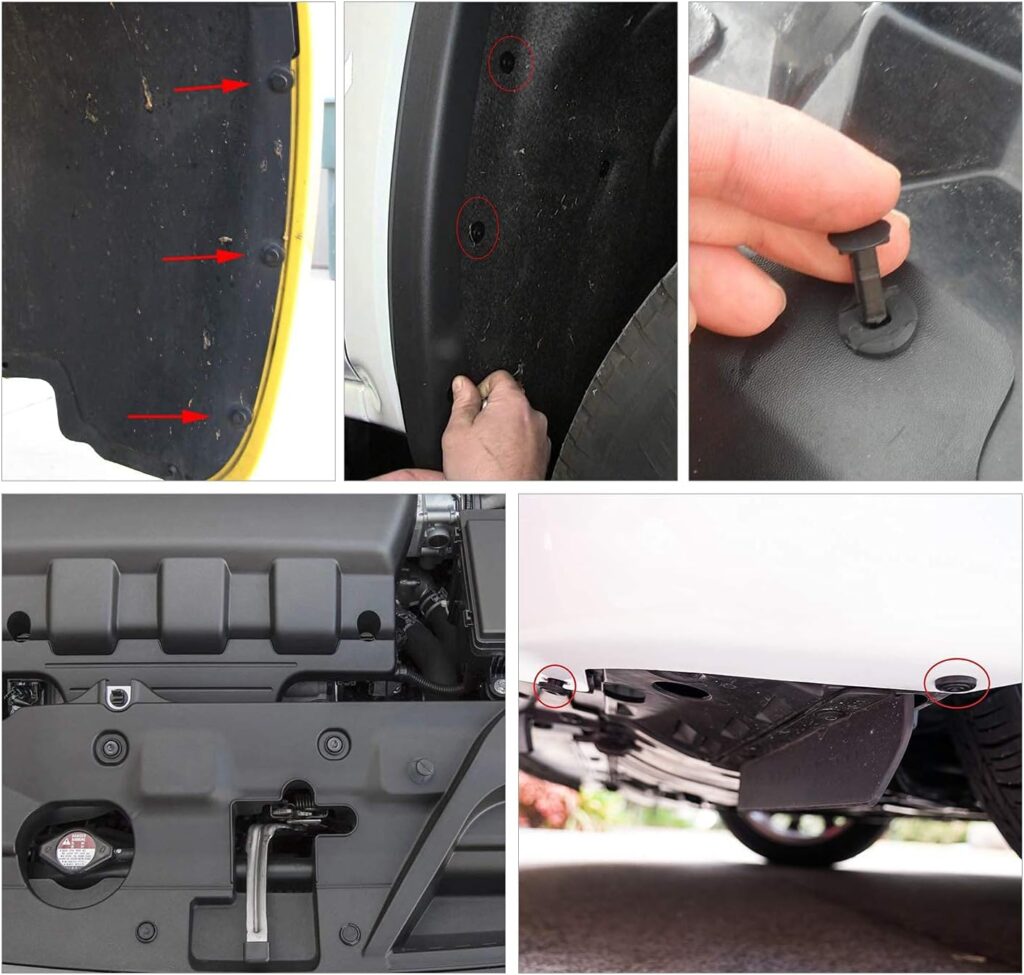
You may want to get a set of additional Bumper Retainer Clips, just in case you damage some or if you find a few missing already.
Use a portable light system to make it easier for you to see.
National Consumer Center offers you a chance to get a $500 gift card to Amazon. The payouts are quick, and you can use the Gift Card to pay for some of your Amazon products.
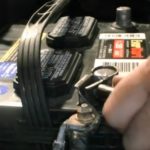
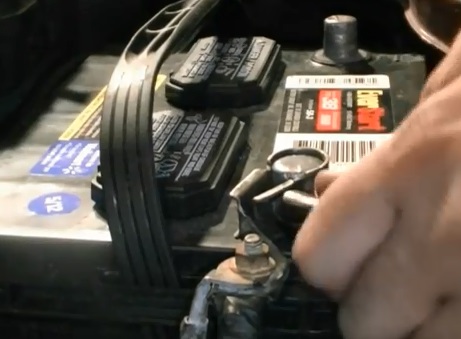
First things first
Start by disconnecting the battery to avoid damage to the airbag. Then remove all the items from the car. Lastly, prepare an area that you will use to keep the items you remove (Seats, console, etc.)
Removing the seats, belts, and trims
Front seats
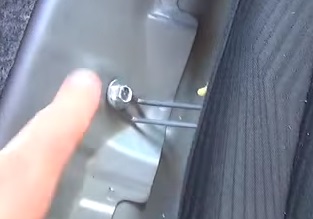
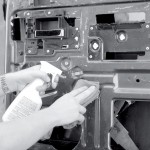
Begin by pushing the seat all the way back to access the two front bolts. You may find plastic clips covering these bolts. You may hold these clips in place with panel pins, but sometimes they have a screw keeping them in place. Then once the clips are off, you should see the bolt or bolts. Remove these bolts, then pull the seat as far forward as possible. Now the back of the seat may have up to 6 bolts (3 on either side). Again there may be clips concealing these bolts. Finally, following the same process, remove the bolts holding the back of the seat in place.
Front seat Safety belt
The safety belt anchor is attached to the bottom of the seat and will need to be removed first. It is usually concealed within a plastic cover. Remove the cover and the bolt.
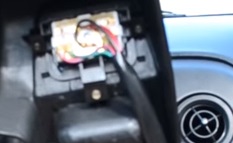
Front seat wiring
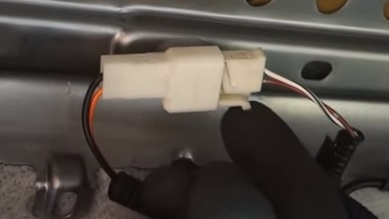
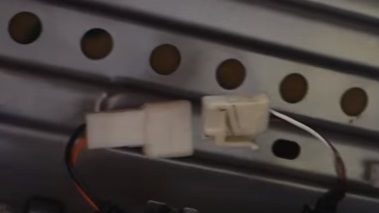
As mentioned in the beginning, you should have removed the battery terminal. If you lift the seat from the back, you should be able to see the wiring. Then carefully unplug the clamps that hold the wiring in place. The wires are held with a plastic clip to the bottom of the seat. Remove that carefully, then remove the seat through the front door.

Backseats
Cushion
First, you may need to remove the bolts and/or screws holding the cushion in place. You’ll find bolts or a single bolt positioned in the middle of the seat. Use your hand to feel between the top half of the seat and the cushion. Removing this bolt will release the rear cushion pin. You may also find screws at the bottom of the cushion which need to be removed as well.
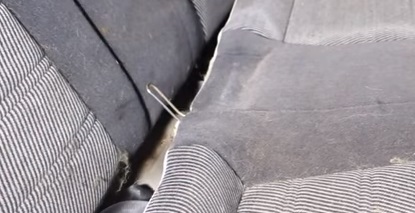
There is a pin at the back of the cushion and two pins in the front that lock the cushion in place. You can remove these pins from their corresponding slots. You’ll find these roughly in line with the middle of the passenger seat and the middle of the driver’s seat. Begin by lifting the cushion from the front.
You may need to use a lever to achieve this by placing it underneath the cushion and gently lifting the pins on either side. It would be best to release the pin at the back once you lift the seat up and forward. It’s not always required to remove the seatbelt anchor in this step. Lastly, thread the seatbelt clips through the cushion and remove the cushion from the car.
Top half
First, drop the seats forward, and you should find four bolts that release the top half of the backseats that need to be removed. Sometimes they’re covered by a carpeting trim. You may have to remove the plastic clips holding the trim in place first. Then remove all the bolts. Finally, you may need to remove the seatbelt from the guide to avoid it snagging.

Side cushion panels
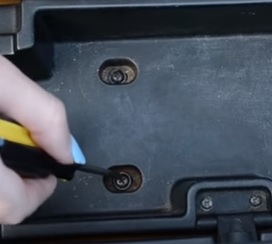
Once you’ve removed the top half and cushion of the back seat, you may still have side cushion panels in place. These are fitted with a bolt at the bottom that releases them. Loosen these bolts, and you should be able to slide the panel up and out.
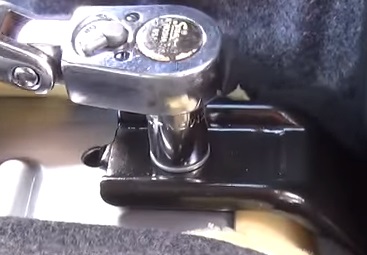
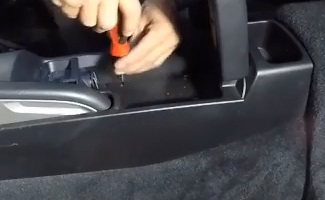
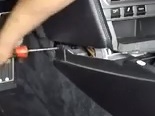
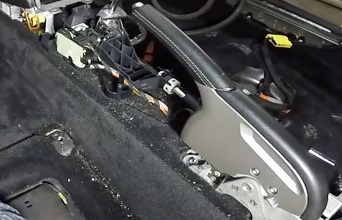
Centre console
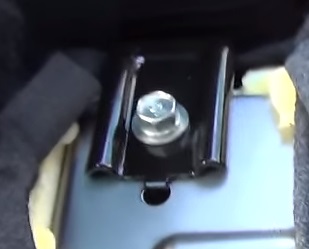
Begin by removing the gear stick head unit. You can do this by unscrewing it, or you may find a release clip. After that, remove the gear stick cover. You may need to shift the gear stick around to achieve this. Use a flashlight to see where the pins are holding.
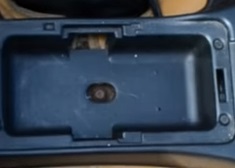
Next, remove the plastic or rubber matting in the armrest compartment and cup holders. There should be a set of screws or bolts underneath that need to be removed.
Underneath the handbrake should also be a set of screws usually covered by a clip. Using the trim removal kit, take off the clip and loosen the screws.
Then check the side and back of the armrest compartment for bolts or screws. If you have a cupholder, this should be removed, which may reveal another set of screws. The sides of the front part of the console also may have plastic clips or screws. Remove all of these as well.
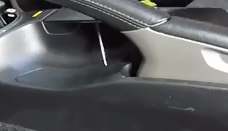
After that, the plastic/rubber housing around the gear stick should clip off, revealing another set of screws. This part will need patience as you will need to move the console around until you find the right angle to remove it. Finally, you should be able to unclip the console and remove it entirely from the car.

Seatbelt
It’s usually not required to remove the backseat safety belts. The front seat safety belts are anchored to the floor. There should be another plastic clip covering a bolt. Remove these.
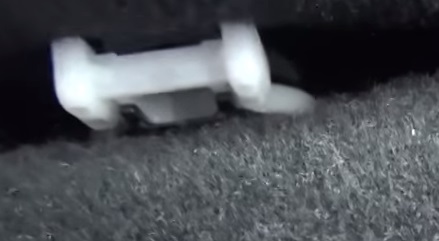
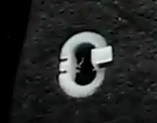
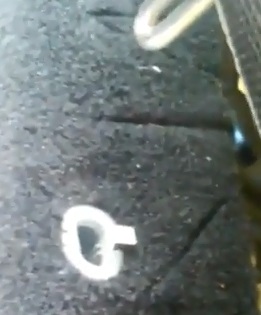
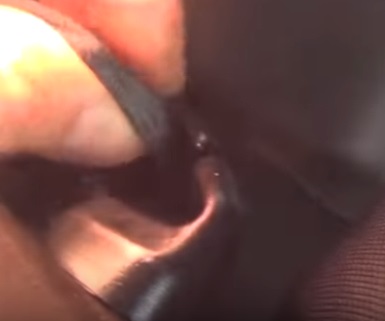
Plastic/Metal trimming
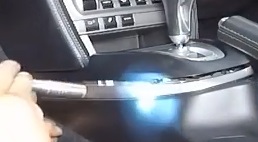
Some of the side trims or kickboards will need to be removed to get to your car flooring. You will need to inspect the panels first. Sometimes you’ll find the weather stripping covering the panel. This needs to be removed.
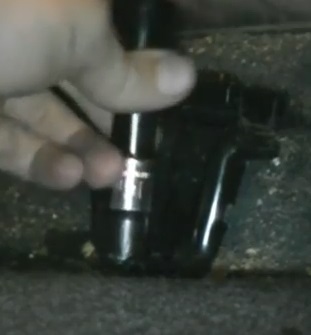
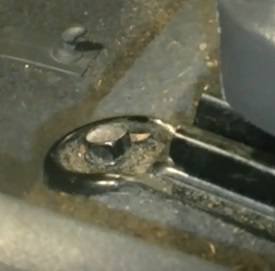
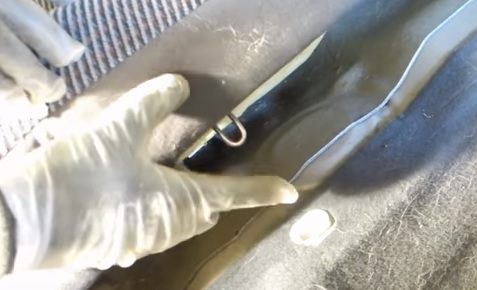
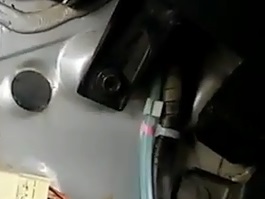
First, check for any exposed screws holding the trim in place and remove these. If you do not find screws check the panel to see where the clips are positioned by moving it around a little to establish the pressure. At the pressure point, you should find the clip underneath the panel. Then using the panel removal tool, slide the head under the panel and gently push down on the lever to lift it. Do this around all the door frames (Where the carpet is being held in place). Finally, if needed, unplug all the wiring carefully.
Using the proper tool here will avoid you breaking the panel pins which you need when replacing everything.
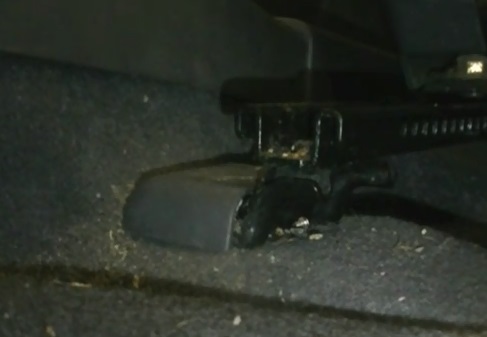
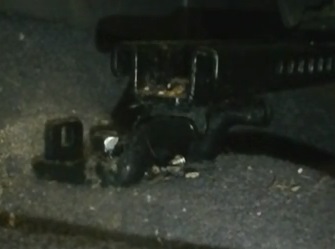
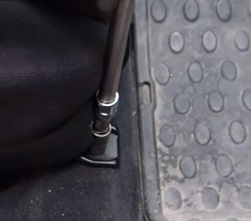
You may also find a pedal plate holding the carpet in place, which needs to be removed by loosening the bolts.
Rear deck
Adding Dynamat to the rear deck will improve the sound quality of your car speakers. However, this is not required to remove with a floor installation. You may want to consider it while you’re at it.
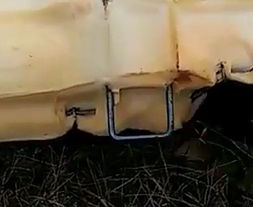
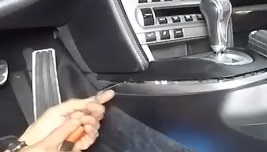
Removing the flooring carpet
If you followed the steps above, you should be ready to remove the carpet. Do a last check to ensure the carpet is loosened from all clips, screws, and bolts. If this is the first time you’re removing the carpet, you may find the foam sticking to the carpet and the car floor.
The best way to remove the carpet is to roll or fold it as you go along. Start from the front under the steering wheel where the pedals are. Then move to the front passenger side and then up to the gear. These are the trickiest areas to get out. Next, thread through all the wiring carefully. Once you’re done in the front, your carpet should be folded or rolled halfway. Then continue rolling the carpet up to the back seat. Finally, remove it completely from the back car door. You may want to give it a good dusting and vacuum it whilst it’s out.
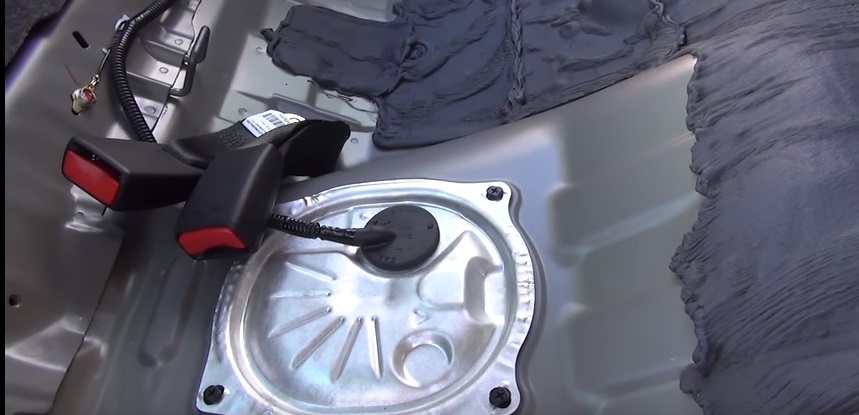
Preparing the floor surface
The surface area needs to be cleaned before you apply the Dynamat. First, use a vacuum to remove any loose dirt. Then use a cloth with rubbing alcohol to clean off any oil and grease marks.
Installing DynaMat
The best product for this project is Dynamat Extreme. Dynamat Extreme is a sound damping material and comes in 36 Sq. Ft (9 X 18″ X32″). It is designed to reduce resonance and vibration on metal surfaces which in turn reduces road noise. For a more effective solution, you would want to add a layer of sound deadening material. Dynamat offers DynaPad, a Dynamat sound deadening material that can be placed on top of the Dynamat Xtreme (amongst some forums, they go as far as recommending two layers of Dynamat and then Dynapad). This will all depend on your requirements and whether or not you have space under your carpet.
Damping material and comes in 36 Sq. Ft (9 X 18″ X32″). It is designed to reduce resonance and vibration on metal surfaces which in turn reduces road noise. For a more effective solution, you would want to add a layer of sound deadening material. Dynamat offers DynaPad, a Dynamat sound deadening material that can be placed on top of the Dynamat Xtreme (amongst some forums, they go as far as recommending two layers of Dynamat and then Dynapad). This will all depend on your requirements and whether or not you have space under your carpet.
See the detailed installation guide of Dynamat
Re-installation
Follow the steps of disassembly.
Conclusion
By applying Dynamat to your car floor, you may find other areas becoming weak points, and you might want to address them also. Your car’s door panels should be the next to be addressed and then your trunk area. See my post on Car Door Damping DIY and How to soundproof your trunk.
So whether you have a hot rod or just your regular family car, installing Dynamat will afford you a more quiet journey.
Good luck and happy soundproofing!
Good luck and happy soundproofing!