Table of Contents
Introduction
Imagine driving down the highway, the roar of the asphalt beneath your tires drowning out the music you’re trying to enjoy. It’s a common frustration for many drivers and passengers alike: the relentless noise seeping into the cabin of your vehicle, forcing you to crank up the volume and strain to hear your favorite tunes or converse with your fellow passengers.
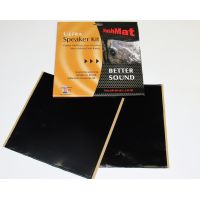
Enter HushMat, a premier solution in the world of automotive sound deadening. This innovative product promises not just to dampen the annoying road noise but also to enhance your driving experience by providing a quieter, more serene cabin environment. But what exactly makes HushMat stand out among the plethora of sound-deadening options available on the market?
In this blog, we’ll dive into the 5 Critical Advantages of HushMat, exploring how it can transform your noisy, vibratory vehicle interior into a calm, peaceful oasis. Whether you’re a DIY enthusiast looking to upgrade your ride or simply curious about the benefits of sound deadening, HushMat offers a compelling array of features designed to improve your automotive life.
HushMat is not just another sound-deadening material; it’s a comprehensive solution tailored to reduce both noise and heat, ensuring your vehicle remains cool and quiet, regardless of the driving conditions.
For a visual guide on the transformative benefits of sound deadening with HushMat, check out this introductory video: General Overview of Sound Deadening Benefits. This video showcases the ease of installation and the immediate impact HushMat can have on reducing noise and enhancing the overall comfort of your vehicle.
Stay tuned as we break down the key features, installation process, and user testimonials, providing you with all the information you need to decide if HushMat is the right choice for your sound-deadening needs.
What is HushMat?
HushMat: Revolutionizing Your Drive with Silence and Comfort
Imagine cruising down the highway, the landscape blurring past you. It’s serene, it’s tranquil, until… the relentless drone of road noise and the discomforting warmth seeping through the floor and doors shatter your peaceful reverie. Here’s where HushMat steps in, turning your vehicle into a haven of silence and comfort.
Composition and Primary Uses
At its core, HushMat is a pioneering solution crafted from butyl rubber, renowned for its exceptional ability to dampen noise and insulate against heat. This versatile material offers a dual-purpose solution, enhancing not just your vehicle’s acoustics but also maintaining a comfortable interior temperature, irrespective of the scorching heat or freezing cold outside.
Where Can You Use HushMat?
Whether it’s the door panels that reverberate with every note from the speakers, the floor that turns into a stove on hot days, or the trunk that amplifies road noise, HushMat’s versatility covers you. Its application isn’t just limited to cars; RVs, trucks, and even home applications can benefit from the tranquility and comfort it brings.
Explore HushMat Ultra: The flagship product, HushMat Ultra, is celebrated for its ease of installation and its effectiveness in reducing both noise and heat. It’s the go-to choice for a broad spectrum of applications including doors, floors, and trunks, making your ride quieter and cooler.
Why HushMat?
- Noise Reduction: HushMat goes beyond mere sound deadening. It targets a wide range of frequencies, effectively muffling everything from the low rumble of the road to the high-pitched whir of the wind.
- Thermal Insulation: Butyl rubber isn’t just about silence. Its insulating properties keep the heat at bay, ensuring your vehicle’s interior remains cool and comfortable.
- DIY Friendly: The beauty of HushMat lies in its simplicity. The material can be cut to fit any space, adhering effortlessly with a peel-and-stick application. No special tools, no fuss.
Key Features at a Glance
- Superior Sound Dampening: Minimize the noise, maximize the serenity.
- Heat Resistance: Keep the interior cool, even when it’s blistering outside.
- Easy Installation: Peel, stick, and enjoy the silence. It’s that simple.
In Summary
HushMat isn’t just another accessory for your vehicle; it’s a transformative experience. By integrating HushMat into your vehicle, you’re not just enhancing your driving experience; you’re investing in peace, comfort, and enjoyment. Whether it’s a short drive to the store or a cross-country road trip, HushMat ensures every journey is as comfortable and quiet as it should be.
Dive Deeper into HushMat’s World
Ready to transform your vehicle? Visit the official HushMat product page to explore the full range of HushMat products and find the perfect fit for your sound-deadening and thermal insulation needs.
Stay tuned for an in-depth installation guide and more on how HushMat stands up against the competition.
Key Features of HushMat
HushMat: A name synonymous with peace and quiet in the automotive world. But what exactly makes HushMat the go-to solution for vehicle soundproofing and thermal insulation? Let’s dive into the key features that set HushMat apart from the rest.
Ease of Installation
One of HushMat’s standout features is its user-friendly application. Whether you’re a seasoned DIY enthusiast or a first-timer, HushMat’s simple peel-and-stick application means no special tools or prep work is required. It’s as straightforward as measure, cut, and apply, making it perfect for doors, floors, and trunks alike. This ease of use not only saves time but also makes HushMat an accessible option for anyone looking to improve their vehicle’s acoustics and comfort.
- Affiliate Link: HushMat Ultra Starter Kit on Amazon
Heat Resistance
HushMat doesn’t just stop noise; it also blocks out the heat. With its impressive heat resistance, HushMat keeps the interior of your vehicle cooler in the summer months. This feature is particularly beneficial for those living in warmer climates, ensuring a more comfortable driving experience all year round.
- Affiliate Link: HushMat Silencer Megabond on Amazon
Noise Reduction
At its core, HushMat excels in silencing unwanted noise. From the hum of the highway to the rattle of loose parts, HushMat’s butyl rubber material is designed to absorb and dissipate sound waves. This not only enhances the audio quality of your music and conversations but also contributes to a more serene driving environment.
- Affiliate Link: HushMat Wave Breaker on Amazon
Why Choose HushMat?
With HushMat, it’s not just about making your rides quieter or cooler; it’s about transforming your vehicle into a sanctuary of peace. Whether you’re heading to work or embarking on a road trip, HushMat ensures that your journey is as comfortable as it can be.
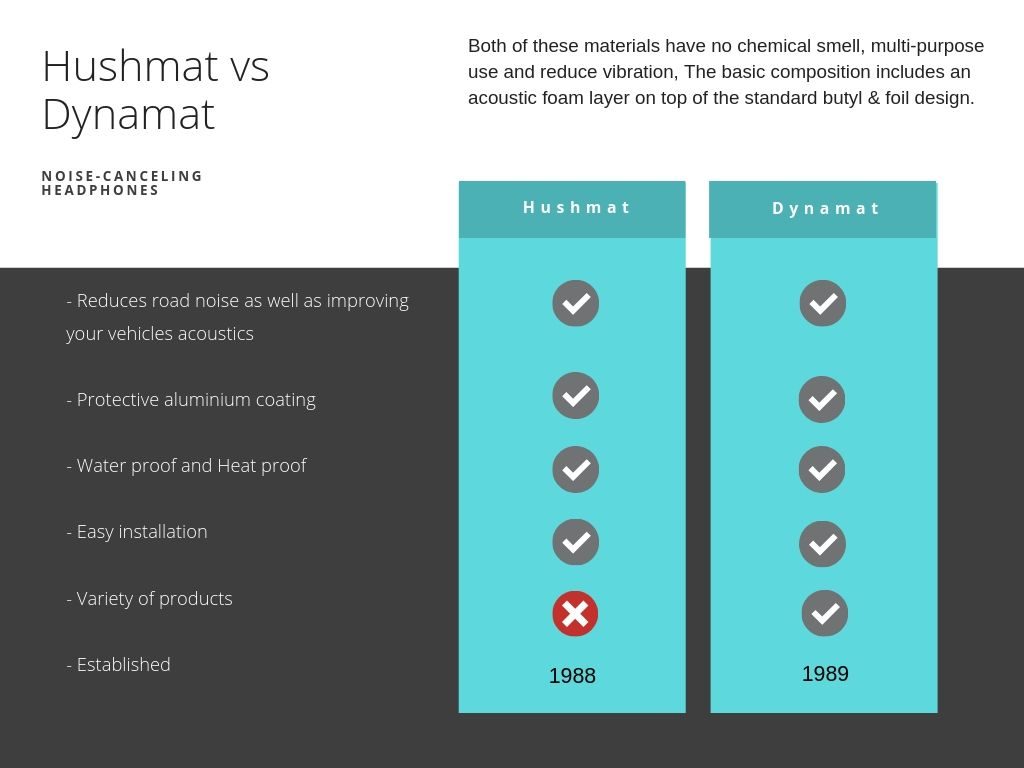
Check out the detailed comparison of HushMat vs. Dynamat to see why HushMat is the top choice for automotive soundproofing.
By integrating these key features into your vehicle, HushMat offers a comprehensive solution to noise and heat, backed by the simplicity of installation and a wealth of positive customer experiences. Whether you’re looking to enhance your driving experience or simply enjoy the silence, HushMat delivers on all fronts.
Ready to quiet your ride? Dive into the world of HushMat and discover the difference for yourself.
Advantages of Using HushMat
When it comes to enhancing your vehicle’s comfort and performance, HushMat stands out as a premier solution in the world of sound deadening and thermal insulation materials. Here’s why choosing HushMat for your vehicle can be a game-changer:
Superior Noise Reduction
HushMat excels in silencing unwanted noise, making every ride more peaceful. Its ability to absorb and dampen a wide range of frequencies means that whether it’s the roar of the engine, the hum of the road, or the cacophony of city traffic, HushMat reduces them all, creating a serene cabin environment.
Excellent Temperature Control
Not only does HushMat quiet your vehicle, but it also keeps it cooler. By reflecting engine heat and insulating the interior, HushMat ensures your rides are comfortable, no matter the weather outside. This temperature control capability is especially beneficial in areas experiencing extreme weather conditions.
Ease of Installation
One of HushMat’s most appealing features is its simplicity of installation. The adhesive backing and material flexibility mean that you can easily apply it yourself without special tools or professional help. Whether it’s the floor, doors, or trunk, HushMat conforms to all surfaces, making DIY projects straightforward and rewarding.
Cost-Effectiveness
While HushMat might initially seem pricier than some alternatives, its value for money is unparalleled. The quality and performance it delivers mean you’re investing in long-term comfort and vehicle enhancement. Over time, the benefits of using HushMat far outweigh the initial costs, making it a smart choice for discerning vehicle owners.
Durability and Versatility
HushMat’s resistance to heat, chemicals, and weather ensures it lasts for the life of your vehicle. Its versatility extends beyond cars to RVs, boats, and even home applications, making it a comprehensive solution for all your sound-dampening and insulation needs.
Testimonials and Reviews:
Don’t just take our word for it; countless customers have shared their positive experiences with HushMat. From dramatically reduced road noise to cooler and more comfortable interiors, the feedback speaks volumes about HushMat’s effectiveness.
Visual Evidence:
For a clearer picture of what HushMat can do, check out our comparison images and charts. These visual aids demonstrate the significant difference HushMat makes in sound deadening and thermal insulation.
Embracing HushMat for your vehicle not only enhances your driving experience but also contributes to the longevity and performance of your ride. With HushMat, the journey becomes just as enjoyable as the destination.
Installation Guide for HushMat
HushMat is a leading solution in sound deadening and thermal insulation for vehicles, known for its ease of application and effectiveness. Whether you’re looking to enhance your ride’s audio quality, reduce road noise, or keep your cabin comfortably cool, HushMat provides a straightforward DIY installation process. Here’s a detailed guide to installing HushMat in your vehicle.
Step 1: Gather Your Materials
Before starting, ensure you have all the necessary materials:
What you’ll need
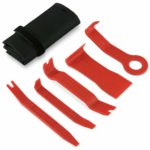
A panel removal tool kit is required for the panel pins. This is because they avoid breakage of the pins during the removal of them. It’s also useful for prying away the panels without doing damage to your vehicle’s paint job.
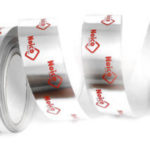
Aluminum tape is also needed. You can patch up the parts where there might be gaps left or use the tape to give your application a clean finish.
Wear a good pair of workman’s gloves while working with the material. The foil edges are sharp and cut through your skin. The glue is also best avoided.

You can use metal shears instead of scissors for products like Dynamat and others. You can also use a switchblade.
Use the correct seam sealer (if required) to avoid it setting and causing ripples on your trunk lid. In addition, the seam sealer should maintain some flex when dries.
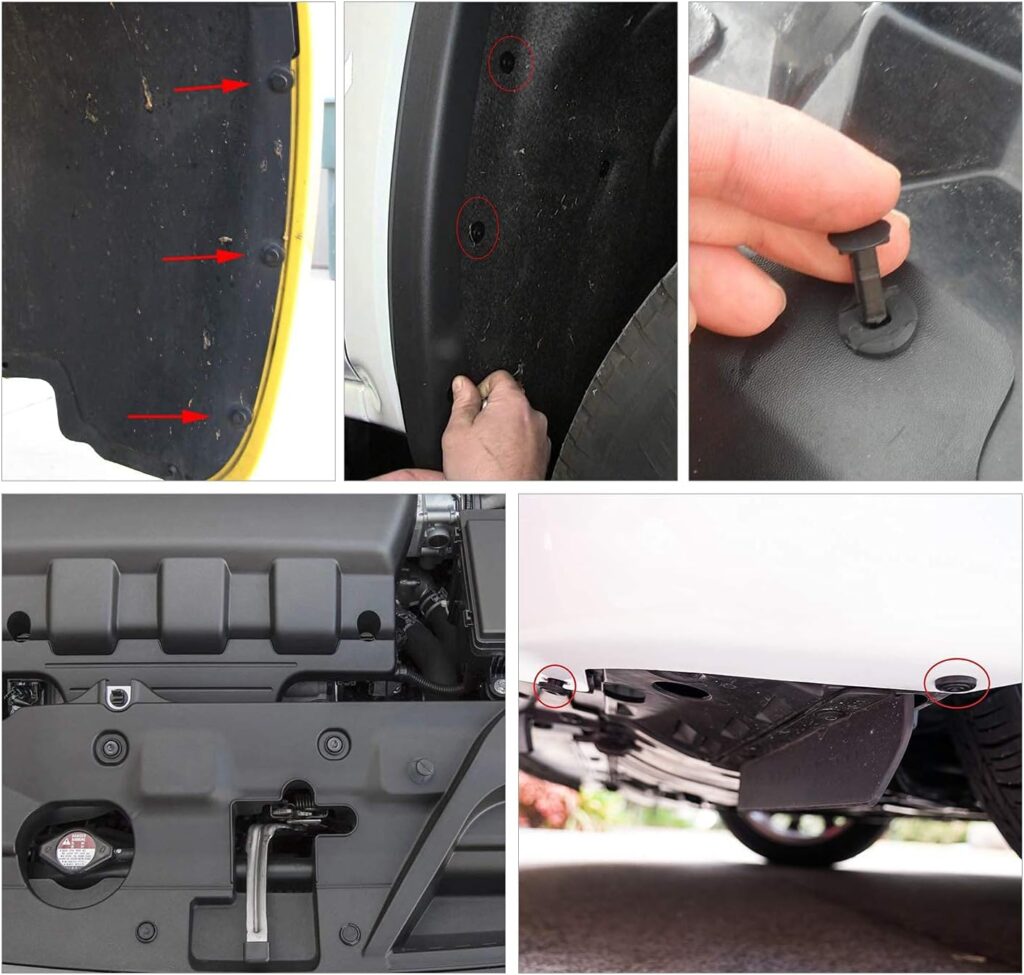
You may want to get a set of additional Bumper Retainer Clips, just in case you damage some or if you find a few missing already.
Use a portable light system to make it easier for you to see.
Step 2: Prepare the Surface
Cleanliness is crucial for optimal adhesion. Clean the application area with a mild detergent and water solution or isopropyl alcohol. Allow the surface to dry completely. This step ensures that dirt, oil, or other contaminants won’t interfere with the adhesive.
Step 3: Measure and Cut HushMat
Measure the area you plan to cover. Cut the HushMat material to size using scissors or a utility knife. It’s better to cut slightly larger pieces; you can always trim excess material later.
Step 4: Apply HushMat
Peel off the backing to reveal the adhesive side. Start from one edge and apply the HushMat sheet to the prepared surface. For larger areas, it may help to peel back part of the liner, apply that section, and then slowly remove the rest of the liner as you go to avoid air bubbles.
Step 5: Smooth Out the HushMat
Using a roller tool or your hands, press down on the HushMat to smooth out any air bubbles and ensure full contact with the surface. Pay special attention to the edges and corners.
Step 6: Repeat as Necessary
Continue applying HushMat sheets, overlapping edges by about 1/2 inch to ensure complete coverage. Cover as much of the interior surface as possible for optimal sound deadening and thermal insulation.
Step 7: Reassemble Your Vehicle
Once all HushMat sheets are in place and firmly adhered, reassemble any parts of your vehicle that were removed. This might include panels, carpeting, or seats.
Tips for Success
- Temperature Matters: For best results, install HushMat on a warm day or in a heated garage. The adhesive bonds best at temperatures between 60°F and 110°F.
- Press Firmly: The harder you press, the better HushMat adheres. Spend extra time pressing down on the material, especially around edges and contours.
- Cover All Areas: For the best sound deadening and thermal insulation, cover as much of the vehicle’s interior as possible. Don’t forget about the doors, floor, roof, and trunk.
Visual Aids and Further Guidance
For visual learners, HushMat provides detailed installation videos that walk you through the process step-by-step. These resources can be invaluable, especially for more complex installations.
- Watch HushMat Installation Videos on YouTube for practical demonstrations.
By following these steps, you’ll be on your way to a quieter, more comfortable ride with HushMat. Remember, patience and thorough preparation are key to achieving the best results from your sound-deadening and thermal insulation project.
HushMat vs. Competitors: A Comparative Analysis
When it comes to sound deadening and thermal insulation for vehicles, HushMat stands out as a top contender. But how does it stack up against leading brands like Dynamat and Kilmat? Let’s dive into a detailed comparison based on effectiveness, cost, installation, and material quality.
Effectiveness
HushMat: Known for its superior noise reduction capabilities, HushMat effectively reduces a wide range of frequencies, offering a peaceful ride. Its butyl rubber composition also provides excellent thermal insulation, keeping the vehicle cooler.
Dynamat: Dynamat is slightly thicker than HushMat, which may contribute to its ability to absorb noise better. However, this also makes it slightly more challenging to install.
Kilmat: While Kilmat is more budget-friendly, it may not provide the same level of noise reduction as HushMat, especially in extreme conditions.
Cost
HushMat: HushMat is competitively priced, offering great value for the quality and performance it delivers. It might be higher priced than Kilmat but is often found to be more cost-effective than Dynamat due to its versatility and effectiveness.
Dynamat: Known for its high-end quality, Dynamat comes with a higher price tag, which might not be suitable for all budgets.
Kilmat: Kilmat stands out for its affordability, making it an attractive option for those on a tight budget.
Ease of Installation
HushMat: Its ease of installation is one of HushMat’s selling points, thanks to its flexible material and adhesive backing. It can be easily cut to fit any space without the need for professional installation.
Dynamat: Requires a bit more effort to install due to its thickness and rigidity.
Kilmat: Similar to HushMat, Kilmat is also easy to install, which makes it appealing for DIY enthusiasts.
Durability and Versatility
HushMat: Highly durable and resistant to heat, chemicals, and weather, ensuring long-term use across various applications.
Dynamat and Kilmat: Both offer durability, but HushMat’s unique formulation and manufacturing process give it an edge in versatility and performance longevity.
Comparative Table
| Feature | HushMat | Dynamat | Kilmat |
|---|---|---|---|
| Effectiveness | Superior noise reduction & thermal insulation | Excellent noise absorption; slightly better in extreme conditions | Good for budget-conscious; slightly less effective |
| Cost | Competitive; great value | Higher-end; more expensive | Most affordable |
| Ease of Installation | Easy; DIY-friendly | More effort required | Easy; DIY-friendly |
| Durability | Highly durable; versatile | Durable; slightly less versatile | Durable; focused on soundproofing |
National Consumer Center offers you a chance to get a $500 gift card to Amazon. The payouts are quick, and you can use the Gift Card to pay for some of your Amazon products.
This analysis highlights HushMat’s strengths in offering a balanced combination of effectiveness, affordability, ease of installation, and long-term durability, making it a preferred choice for many vehicle owners seeking to improve their driving experience.
Conclusion: Why Choose HushMat?
In the crowded market of automotive sound deadening solutions, HushMat emerges as a compelling choice for vehicle owners looking to enhance their driving experience. Its blend of superior performance, ease of installation, and long-term value sets it apart from competitors like Dynamat and Kilmat. Let’s recap the critical advantages of choosing HushMat for your sound deadening needs.
Unparalleled Noise Reduction
HushMat’s effectiveness in reducing a wide range of frequencies ensures a peaceful ride, free from the intrusive road, engine, and environmental noises. Its superior noise reduction capability is not just a claim but a proven benefit that countless users have experienced firsthand.
Exceptional Temperature Control
Beyond sound dampening, HushMat excels in keeping your vehicle cooler by reflecting engine and external heat away, enhancing the comfort of your driving experience regardless of the weather conditions outside.
DIY-Friendly Installation
One of HushMat’s standout features is its ease of installation. With its adhesive backing and flexibility, HushMat can be applied to nearly any surface within your vehicle without the need for professional tools or services, making it an ideal choice for DIY enthusiasts.
Cost-Effectiveness
While HushMat might carry a higher upfront cost compared to some alternatives, its durability, effectiveness, and the breadth of its applications offer significant long-term value. It’s an investment in your vehicle that pays dividends in comfort and quality.
Durability and Versatility
HushMat’s resistance to heat, chemicals, and weather conditions ensures it remains effective over the life of your vehicle. Its versatility in applications, from classic cars to modern SUVs, speaks to its broad appeal and functionality.
Making the Right Choice
Choosing HushMat for your vehicle’s sound deadening and thermal insulation needs means investing in a quality product that delivers on its promises. Whether you’re looking to enhance your audio experience, reduce noise for a more peaceful ride, or keep your vehicle cooler, HushMat offers a comprehensive solution.
Get Started with HushMat
Ready to transform your driving experience with HushMat? Visit our product page to explore the full range of HushMat solutions and find the perfect fit for your vehicle.
In conclusion, HushMat isn’t just a product; it’s a comprehensive solution for anyone looking to improve their vehicle’s acoustic and thermal insulation. By choosing HushMat, you’re not just buying a sound deadener; you’re upgrading your entire driving experience.
You should check your car’s manual first. For around $20, you can find a detailed version. The easiest way to find the hard copy repair manual for your vehicle is to select Repair Manuals by Make and Model. Or you can get an electronic version. They both have all sorts of instructions and guides, whether it’s for customization, maintenance, repair, or even simply just learning about the inner workings of a particular vehicle.
Sound travels through the sheet metal surfaces in your vehicle. Your floor covers the bulk of this. Sound damping this area will significantly reduce noise traveling through your car.
I’ve gathered this information by researching many different sources of information. Sometimes it isn’t easy to find helpful information, but I’m sure you’ll find this useful.
- Firstly remove the front and back seats, the center console, and the floor carpet of your car
- Then prepare the surface area
- After that, apply Dynamat
- Finally, reverse the steps of removal
Installing Dynamat on the floor of your vehicle will
- reduce engine noise
- reduce wind noise
- extend and improve the performance of your vehicle
- improve your car audio sound system (less noise for your car speakers to contend with)
The process for removing the carpet varies from vehicle to vehicle, so I’ve just looked at the most common setups. You’ll need to check your specific vehicle’s user manual and scrutinize the areas yourself.
You should check your car’s manual first. For around $20, you can find a detailed version. The easiest way to find the hard copy repair manual for your vehicle is to select Repair Manuals by Make and Model. Or you can get an electronic version. They both have all sorts of instructions and guides, whether it’s for customization, maintenance, repair, or even simply just learning about the inner workings of a particular vehicle.
What you’ll need
A panel removal tool kit is required for the panel pins. This is because they avoid breakage of the pins during the removal of them. It’s also useful for prying away the panels without doing damage to your vehicle’s paint job.
Aluminum tape is also needed. You can patch up the parts where there might be gaps left or use the tape to give your application a clean finish.
Wear a good pair of workman’s gloves while working with the material. The foil edges are sharp and cut through your skin. The glue is also best avoided.
You can use metal shears instead of scissors for products like Dynamat and others. You can also use a switchblade.
Use the correct seam sealer (if required) to avoid it setting and causing ripples on your trunk lid. In addition, the seam sealer should maintain some flex when dries.
You may want to get a set of additional Bumper Retainer Clips, just in case you damage some or if you find a few missing already.
Use a portable light system to make it easier for you to see.
National Consumer Center offers you a chance to get a $500 gift card to Amazon. The payouts are quick, and you can use the Gift Card to pay for some of your Amazon products.
First things first
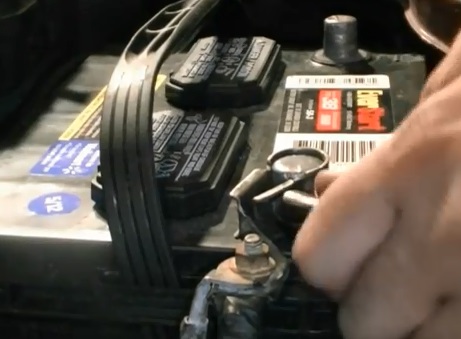
Start by disconnecting the battery to avoid damage to the airbag. Then remove all the items from the car. Lastly, prepare an area that you will use to keep the items you remove (Seats, console, etc.)

Removing the seats, belts, and trims
Front seats
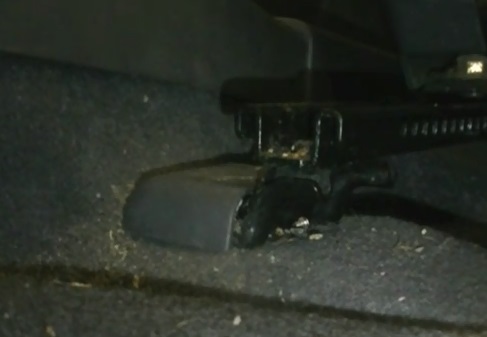
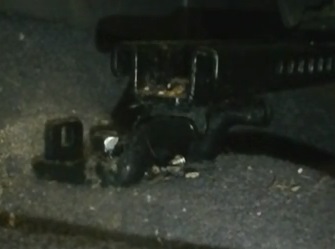
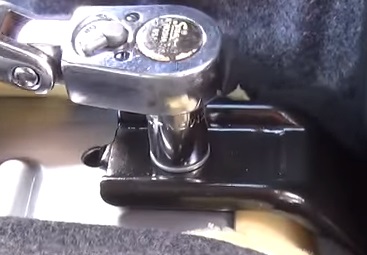
Begin by pushing the seat all the way back to access the two front bolts. You may find plastic clips covering these bolts. You may hold these clips in place with panel pins, but sometimes they have a screw keeping them in place. Then once the clips are off, you should see the bolt or bolts. Remove these bolts, then pull the seat as far forward as possible. Now the back of the seat may have up to 6 bolts (3 on either side). Again there may be clips concealing these bolts. Finally, following the same process, remove the bolts holding the back of the seat in place.
Front seat Safety belt
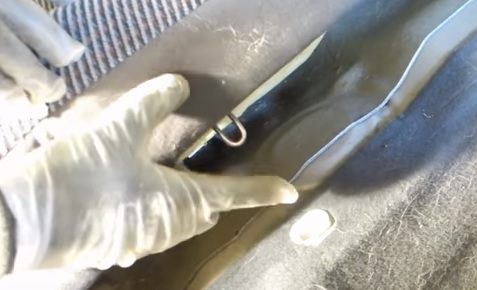
The safety belt anchor is attached to the bottom of the seat and will need to be removed first. It is usually concealed within a plastic cover. Remove the cover and the bolt.
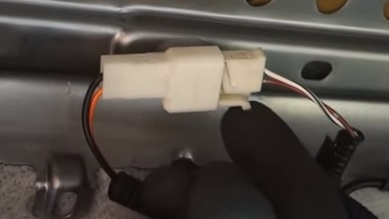
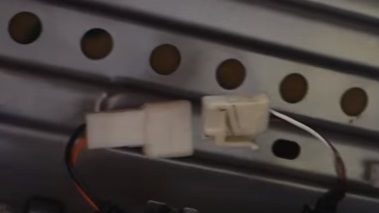
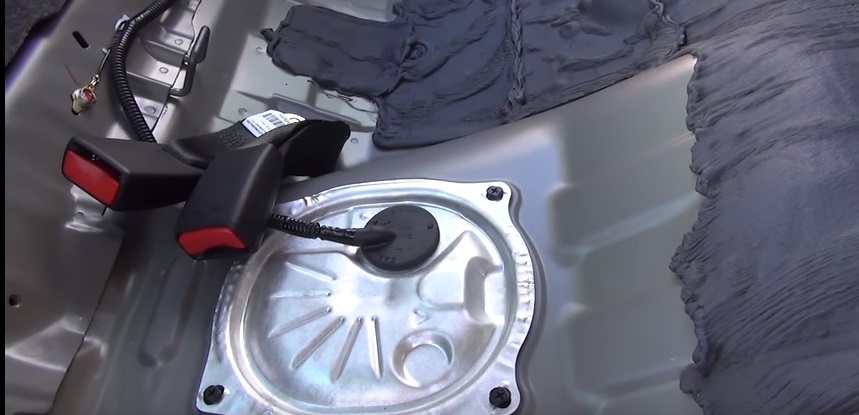
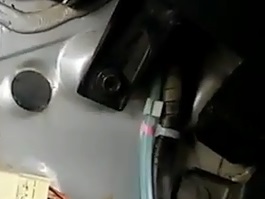
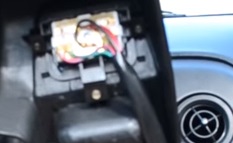
Front seat wiring
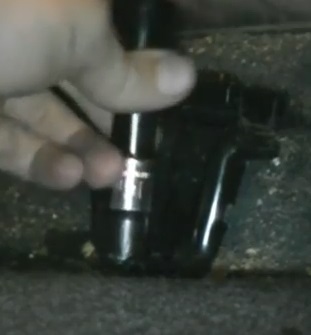
As mentioned in the beginning, you should have removed the battery terminal. If you lift the seat from the back, you should be able to see the wiring. Then carefully unplug the clamps that hold the wiring in place. The wires are held with a plastic clip to the bottom of the seat. Remove that carefully, then remove the seat through the front door.

Backseats
Cushion
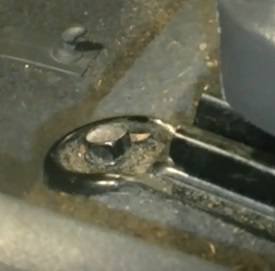
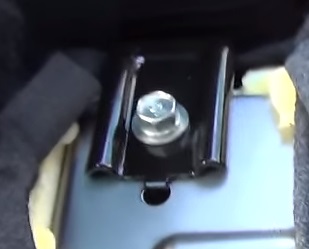
First, you may need to remove the bolts and/or screws holding the cushion in place. You’ll find bolts or a single bolt positioned in the middle of the seat. Use your hand to feel between the top half of the seat and the cushion. Removing this bolt will release the rear cushion pin. You may also find screws at the bottom of the cushion which need to be removed as well.
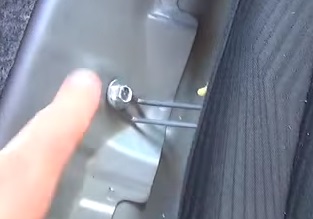
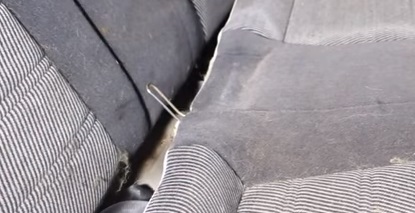
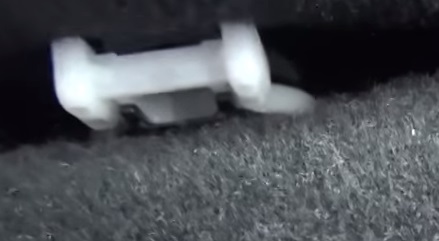
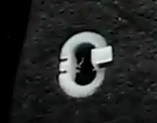
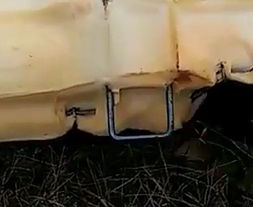
There is a pin at the back of the cushion and two pins in the front that lock the cushion in place. You can remove these pins from their corresponding slots. You’ll find these roughly in line with the middle of the passenger seat and the middle of the driver’s seat. Begin by lifting the cushion from the front.
You may need to use a lever to achieve this by placing it underneath the cushion and gently lifting the pins on either side. It would be best to release the pin at the back once you lift the seat up and forward. It’s not always required to remove the seatbelt anchor in this step. Lastly, thread the seatbelt clips through the cushion and remove the cushion from the car.
Top half
First, drop the seats forward, and you should find four bolts that release the top half of the backseats that need to be removed. Sometimes they’re covered by a carpeting trim. You may have to remove the plastic clips holding the trim in place first. Then remove all the bolts. Finally, you may need to remove the seatbelt from the guide to avoid it snagging.

Side cushion panels
Once you’ve removed the top half and cushion of the back seat, you may still have side cushion panels in place. These are fitted with a bolt at the bottom that releases them. Loosen these bolts, and you should be able to slide the panel up and out.
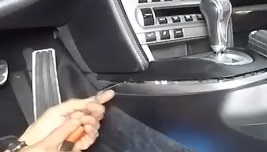
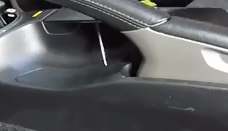
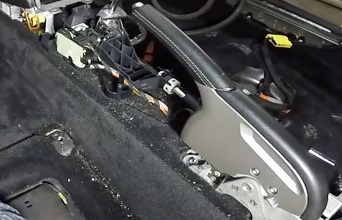
Centre console
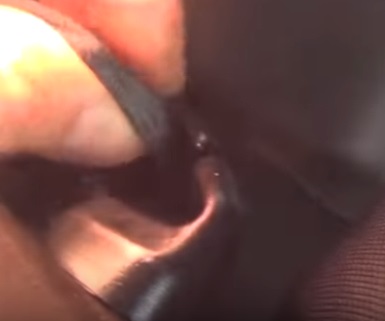
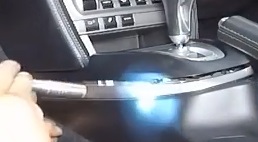
Begin by removing the gear stick head unit. You can do this by unscrewing it, or you may find a release clip. After that, remove the gear stick cover. You may need to shift the gear stick around to achieve this. Use a flashlight to see where the pins are holding.
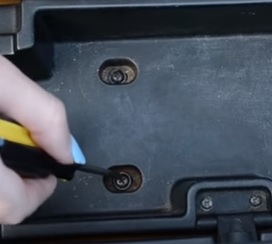
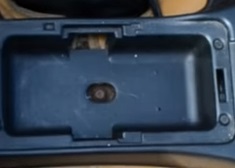
Next, remove the plastic or rubber matting in the armrest compartment and cup holders. There should be a set of screws or bolts underneath that need to be removed.
Underneath the handbrake should also be a set of screws usually covered by a clip. Using the trim removal kit, take off the clip and loosen the screws.
Then check the side and back of the armrest compartment for bolts or screws. If you have a cupholder, this should be removed, which may reveal another set of screws. The sides of the front part of the console also may have plastic clips or screws. Remove all of these as well.
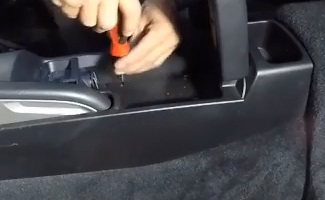
After that, the plastic/rubber housing around the gear stick should clip off, revealing another set of screws. This part will need patience as you will need to move the console around until you find the right angle to remove it. Finally, you should be able to unclip the console and remove it entirely from the car.

Seatbelt
It’s usually not required to remove the backseat safety belts. The front seat safety belts are anchored to the floor. There should be another plastic clip covering a bolt. Remove these.
Plastic/Metal trimming
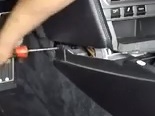
Some of the side trims or kickboards will need to be removed to get to your car flooring. You will need to inspect the panels first. Sometimes you’ll find the weather stripping covering the panel. This needs to be removed.
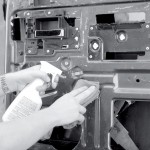
First, check for any exposed screws holding the trim in place and remove these. If you do not find screws check the panel to see where the clips are positioned by moving it around a little to establish the pressure. At the pressure point, you should find the clip underneath the panel. Then using the panel removal tool, slide the head under the panel and gently push down on the lever to lift it. Do this around all the door frames (Where the carpet is being held in place). Finally, if needed, unplug all the wiring carefully.
Using the proper tool here will avoid you breaking the panel pins which you need when replacing everything.
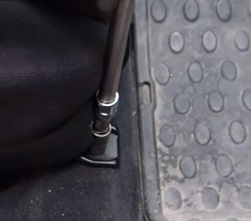
You may also find a pedal plate holding the carpet in place, which needs to be removed by loosening the bolts.
Rear deck
Adding Dynamat to the rear deck will improve the sound quality of your car speakers. However, this is not required to remove with a floor installation. You may want to consider it while you’re at it.
Removing the flooring carpet
If you followed the steps above, you should be ready to remove the carpet. Do a last check to ensure the carpet is loosened from all clips, screws, and bolts. If this is the first time you’re removing the carpet, you may find the foam sticking to the carpet and the car floor.
The best way to remove the carpet is to roll or fold it as you go along. Start from the front under the steering wheel where the pedals are. Then move to the front passenger side and then up to the gear. These are the trickiest areas to get out. Next, thread through all the wiring carefully. Once you’re done in the front, your carpet should be folded or rolled halfway. Then continue rolling the carpet up to the back seat. Finally, remove it completely from the back car door. You may want to give it a good dusting and vacuum it whilst it’s out.
Preparing the floor surface
The surface area needs to be cleaned before you apply the Dynamat. First, use a vacuum to remove any loose dirt. Then use a cloth with rubbing alcohol to clean off any oil and grease marks.
Installing DynaMat
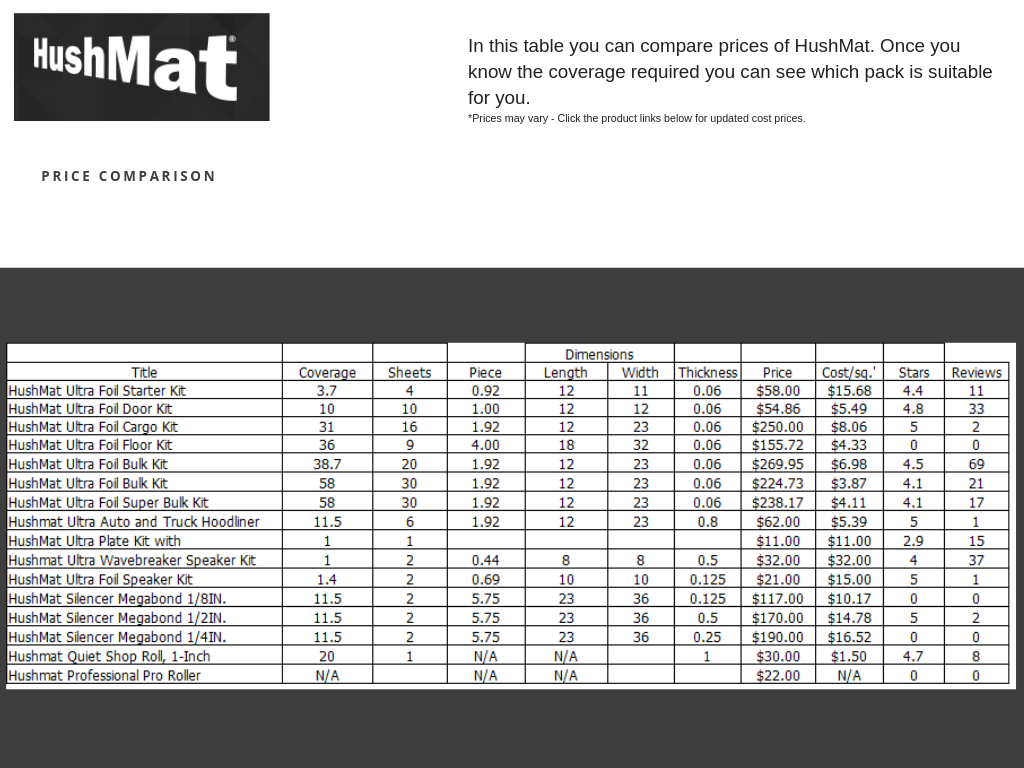
The best product for this project is Dynamat Extreme. Dynamat Extreme is a sound damping material and comes in 36 Sq. Ft (9 X 18″ X32″). It is designed to reduce resonance and vibration on metal surfaces which in turn reduces road noise. For a more effective solution, you would want to add a layer of sound deadening material. Dynamat offers DynaPad, a Dynamat sound deadening material that can be placed on top of the Dynamat Xtreme (amongst some forums, they go as far as recommending two layers of Dynamat and then Dynapad). This will all depend on your requirements and whether or not you have space under your carpet.
Damping material and comes in 36 Sq. Ft (9 X 18″ X32″). It is designed to reduce resonance and vibration on metal surfaces which in turn reduces road noise. For a more effective solution, you would want to add a layer of sound deadening material. Dynamat offers DynaPad, a Dynamat sound deadening material that can be placed on top of the Dynamat Xtreme (amongst some forums, they go as far as recommending two layers of Dynamat and then Dynapad). This will all depend on your requirements and whether or not you have space under your carpet.
See the detailed installation guide of Dynamat
Re-installation
Follow the steps of disassembly.
Conclusion
By applying Dynamat to your car floor, you may find other areas becoming weak points, and you might want to address them also. Your car’s door panels should be the next to be addressed and then your trunk area. See my post on Car Door Damping DIY and How to soundproof your trunk.
So whether you have a hot rod or just your regular family car, installing Dynamat will afford you a more quiet journey.
Good luck and happy soundproofing!
Good luck and happy soundproofing!
Sound Dampening, Vibration Damping, Thermal Insulation for automotive applications – HUSHMAT. (2024). Retrieved from https://hushmat.com