
A room in a room soundproofing system is one of the more effective approaches to reducing sound transmission when a high level of isolation is required. Instead of relying on surface treatments alone, the idea is to build a second structure inside the existing room with as little direct mechanical connection to the original walls, ceiling, and floor as practical.
This approach is commonly used for home studios, music rooms, home theaters, offices, and other spaces where ordinary soundproofing measures may not provide enough isolation.
The key principles are decoupling, mass, absorption, damping, and sealing. A successful room-within-a-room design combines these rather than relying on one material to do everything.
How Room in a Room Soundproofing Works
Sound moves through building structures as both airborne noise and vibration. When two surfaces are rigidly connected, vibration can travel through studs, joists, and other structural components.
A room-in-a-room design reduces these direct transmission paths by creating a separate inner structure. The inner walls and ceiling can then be filled with insulation and finished with dense layers such as drywall.
The greater the physical separation between the inner and outer structures, the less opportunity there is for vibration to pass directly from one to the other. However, even a well-decoupled room can lose performance if gaps, doors, ventilation ducts, electrical penetrations, or other weak points are ignored.
Materials You May Need
- Framing materials: Timber studs or metal framing can be used to create the inner walls and ceiling structure.
- Fiberglass or mineral wool insulation: Filling wall and ceiling cavities helps absorb sound energy inside the assembly.
- Mass-loaded vinyl (MLV): A dense flexible barrier that can be incorporated into some soundproofing assemblies where additional mass is useful.
- Acoustic sealant: Flexible sealant helps close perimeter gaps, seams, and penetrations that could otherwise allow sound to leak through.
- Drywall: Multiple layers can add substantial mass to walls and ceilings.
- Damping compound: A product such as Green Glue Noiseproofing Compound can be installed between rigid layers such as drywall to help damp vibration.
- Isolation clips and channels: These can help mechanically separate drywall from framing where a fully independent frame is not being used.
- Acoustic panels: Useful after construction for controlling echo and reverberation inside the finished room. They are acoustic treatments rather than substitutes for structural soundproofing.
- Door and window treatments: Solid doors, seals, sweeps, and appropriately designed windows can help address major weak points.
- Floor isolation materials: Depending on the design, this may include resilient underlayment, isolation pads, or a floating-floor system.
For more detail on reducing floor noise, see our guide to sound attenuation floor underlayment.
Plan the Space Before Building
Room-in-a-room construction reduces the usable dimensions of the original space, so planning matters before any framing begins.
- Measure the existing room: Record the available width, length, and ceiling height before deciding how much space can be sacrificed to the inner structure.
- Define the purpose: A recording room, home theater, music practice room, and quiet office may have different isolation and acoustic-treatment requirements. For office-specific ideas, see our home office soundproofing guide.
- Plan ventilation: A highly sealed room still needs safe and adequate fresh-air exchange. Ventilation should be considered from the beginning because ducts and openings can become major sound paths.
- Plan electrical services: Decide where outlets, lighting, switches, and equipment connections will be placed so unnecessary penetrations are avoided later.
- Plan doors and windows: Every opening weakens the enclosure, so keep them to the minimum required for the room’s intended use.
- Set a realistic budget: Framing, insulation, drywall, isolation hardware, doors, ventilation, electrical work, and finishing materials can add up quickly.
Build the Inner Framework
The framework forms the structural basis of the inner room. The goal is to create a stable enclosure while minimizing rigid connections to the existing structure wherever the design allows.
- Mark the layout: Transfer the dimensions of the planned inner room onto the existing floor and ceiling.
- Construct the inner walls: Build the framing according to the planned dimensions while maintaining the required separation from the existing walls.
- Build the ceiling structure: A truly independent ceiling requires careful structural planning. The design must safely support its own weight and the finishing materials attached to it.
- Avoid unnecessary bridging: Rigid connections between the inner and outer structures can create flanking paths through which vibration travels.
- Plan the doorway: Make sure the frame can support the chosen door and sealing system without compromising the surrounding wall construction.
If you are working with an existing wall rather than building a fully independent structure, isolation clips and channels can provide another method of reducing mechanical connection between the drywall and framing.
Add Insulation Inside the Cavities
Once the frame is complete, fill the wall and ceiling cavities with suitable fiberglass or mineral wool insulation. The insulation helps absorb sound energy inside the cavity and reduces resonance between the layers of the assembly.
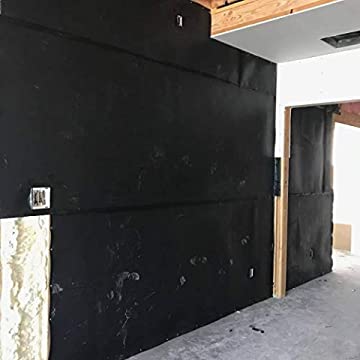
Do not compress insulation excessively in an attempt to improve performance. Install it according to the manufacturer’s guidance and make sure cavities are filled consistently without large gaps.
Add Mass and Damping
After insulation, the next stage is adding mass to the inner enclosure. Drywall is commonly used because it is dense, relatively inexpensive, and straightforward to layer.
Using two layers of drywall can improve sound isolation compared with a single layer. A damping compound can also be installed between the layers to reduce vibration.
Green Glue Noiseproofing Compound, for example, is designed to be applied between rigid building materials rather than left exposed as a finished surface.
Mass-loaded vinyl can also be incorporated into some wall, ceiling, or floor assemblies, although it should be treated as one component of the system rather than as a complete soundproofing solution on its own.
Seal the Perimeter and Penetrations
Small gaps can undermine an otherwise well-built soundproof enclosure. Pay close attention to the junctions where walls meet floors and ceilings, as well as electrical boxes, cable penetrations, ducts, and door frames.
Use a suitable flexible acoustic sealant around the perimeter and other appropriate locations. The goal is to close air paths without creating unnecessary rigid bridges between isolated surfaces.
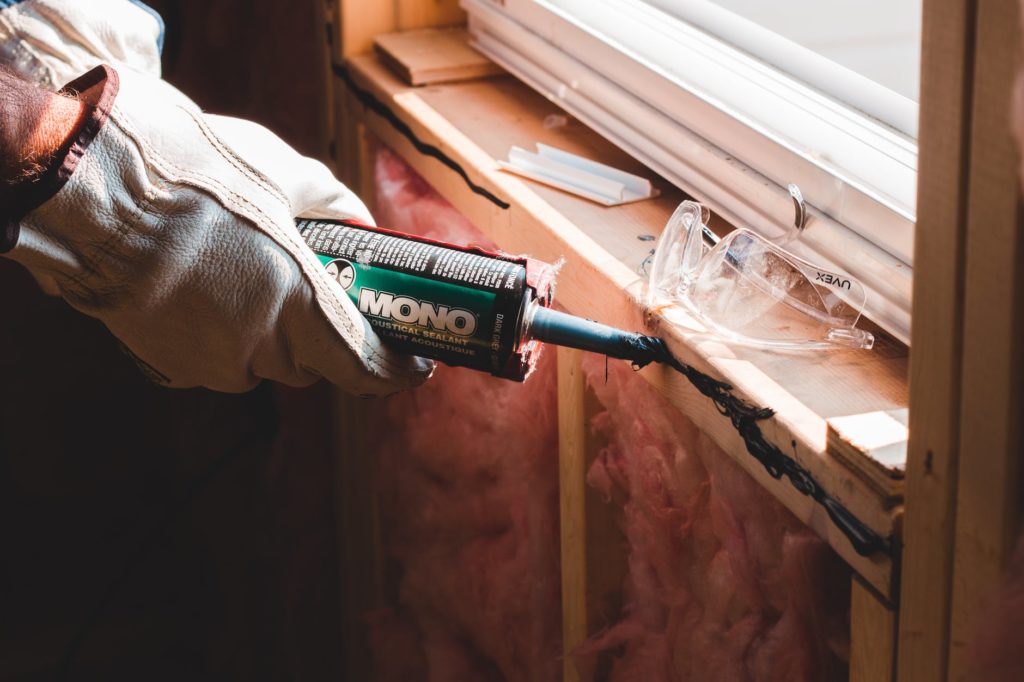
Seal carefully around openings and transitions. Sound follows weak points, so attention to these details can be just as important as adding another layer of material.
Soundproof the Door
The door is usually one of the weakest parts of a sound-isolated room. A lightweight hollow-core door can allow considerably more sound through than a properly constructed wall.
A solid, heavy door with effective perimeter seals and a properly fitted door sweep is generally a better choice. For more information, see our guide to soundproof doors.
For very demanding rooms, two separated doors can sometimes be used to create an airlock-style entrance, although this requires more space and careful detailing.
Treat Windows Carefully
Windows introduce another potential sound path. If the room does not require a window, omitting one can simplify the isolation design.
If a window is necessary, increasing glass mass, using multiple panes, maintaining suitable air space between layers, and sealing the frame carefully can all contribute to improved isolation.
See our soundproof windows guide for a broader look at window options and noise reduction.
Reduce Floor and Impact Noise
Floor treatment becomes particularly important when the room is used for music, exercise, drums, speakers, or other activities that create structural vibration.
Depending on the required level of isolation, options range from dense carpet and padding to resilient acoustic underlayment or a properly designed floating floor.
A floating floor is a more advanced approach in which the finished floor assembly is mechanically isolated from the structural floor below. It can be effective, but it must be designed carefully because excessive flexibility or incorrect loading can create structural and flooring problems.
For additional floor options, see our guides to sound attenuation floor underlayment and ceiling and floor soundproofing.
Plan Quiet Ventilation
Ventilation is one of the most important parts of a room-in-a-room project because a highly sealed room can quickly become uncomfortable and unsafe without adequate air exchange.
At the same time, a simple open duct can act as a direct path for sound. A quieter ventilation design may use longer duct runs, lined ducts, bends, oversized low-velocity ducts, or purpose-built silencers to reduce noise transmission while maintaining airflow.
Ventilation requirements should be planned before the walls and ceiling are closed. Where building codes, fire requirements, mechanical systems, or complex structural work are involved, professional design may be appropriate.
Add Acoustic Treatment Inside the Finished Room
Once structural sound isolation is complete, you can address the acoustics inside the room.
Acoustic foam and panels can reduce reflections, echo, and reverberation. These products can make a studio, office, or home theater sound better internally, but they should not be confused with the dense structural materials used to stop noise passing through the enclosure.
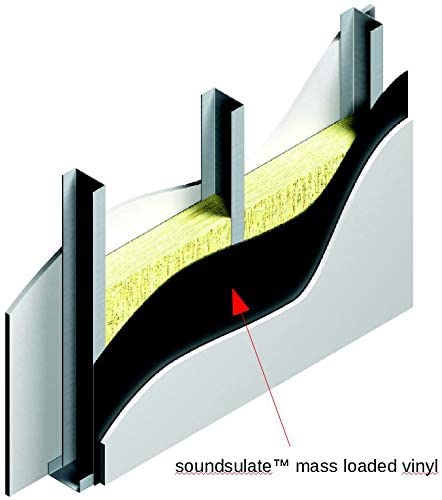
Structural soundproofing and acoustic treatment perform different jobs. Build the isolation first, then add internal treatment according to how the finished room will be used.
Soft furnishings can also help control reflections. Thick curtains, for example, can reduce some high-frequency reflections around windows, while rugs can reduce floor reflections. See our guides to sound-dampening curtains and soundproof rug pads.
Common Room in a Room Soundproofing Mistakes
- Rigidly connecting the inner room to the original structure: These connections can provide a direct path for vibration.
- Ignoring doors and ventilation: A strong wall assembly cannot compensate for a poorly sealed door or open duct.
- Using acoustic foam as soundproofing: Foam controls reflections inside a room but does not replace mass, damping, insulation, or decoupling.
- Leaving gaps: Open seams and penetrations can significantly reduce the performance of the enclosure.
- Adding layers without checking compatibility: More material is not automatically better. Floor systems, channels, clips, framing, and fasteners must be installed correctly.
- Forgetting the loss of interior space: Independent framing, air gaps, drywall layers, and floor systems can reduce both room dimensions and ceiling height.
Sound sealing or weatherproofing for an air-tight seal
Airgaps need to be treated to ensure complete coverage and manage sound seeping in through the frame. It would be best if you did this on both sides and at the top of the frame. Weatherstripping requires little effort but, done properly; it’s an effective sound management method.
Most products use a peel-and-stick function. Surface preparation is required as the glue needs a clean area to ensure adhesion. An alcohol wash is not always required but is recommended. Installation should be done on the inner part of the frame.
You can use two methods for this:
Acoustic gasket
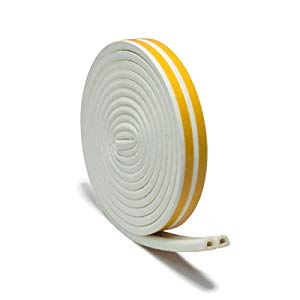
This is a foam rubber composite material that is a hollow “D” shape. When compressed, the gasket seals off and prevents airflow. If the gap is wide enough, you may end up with an air pocket which is just as effective as a soundproofing method.
Peel off the protective strip to expose the sticky side of the tape and then stick the gasket to the frame on all the edges as required.
Closed-cell foam
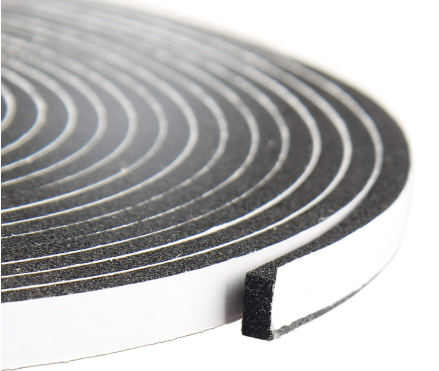
Yotache foam seal tape can be used around a door frame to seal small gaps. When compressed between the door and frame, it helps reduce sound leakage around the edges.
Again peel-and-stick methods are commonly utilized for the application, which makes it easy to install.
Is a Room in a Room Worth Building?
A room-in-a-room system makes the most sense when substantial sound isolation is required and simpler measures are unlikely to be enough. Recording studios, music practice rooms, home theaters, and particularly noisy shared buildings are common examples.
For ordinary household noise, a complete independent room may be more construction than necessary. Improvements to walls, ceilings, floors, doors, or windows can sometimes address the main transmission path without rebuilding the entire space.
The AcousticCurtain™ from Residential Acoustics
The AcousticCurtain™ is a soundproof curtain that blocks outside noise, solving your noise problems at minimal expense and without disrupting the comforts of your home. Each AcousticCurtain™ is hand-crafted and customized to fit the dimensions of your window.
To deflect sound, the curtain uses a dense, flexible, sound-blocking core that averages between 10-15 pounds — although much smaller or larger curtains may vary.
Other benefits
- Light-blocking: the AcousticCurtain blocks more than 99% of outside light.
- Thermal properties: AcousticCurtain soundproofing has insulating properties, lowering your home’s heating and cooling costs.
- Decor: available in a wide variety of colors, the AcousticCurtain™ pairs well with any living space.
The AcousticCurtain blocks most outside noise, dramatically transforming your home’s atmosphere.
Final Thoughts
Effective room-in-a-room soundproofing comes from combining several principles correctly: separate the structures where practical, add mass, absorb energy inside cavities, damp rigid layers, and seal the weak points.
The details matter. A small structural bridge, poorly sealed door, untreated duct, or open penetration can undermine an otherwise substantial build.
For a DIY project, plan the complete system before construction begins rather than adding products one at a time. That usually produces a more efficient build and avoids expensive corrections later.
Good luck and happy soundproofing!
2 comments
Comments are closed.