Welcome to the ultimate guide for all you Weekend Warriors out there looking to dive into DIY soundproofing projects! Whether you’re looking to create a serene home office, or a quiet nursery, or simply want to reduce noise pollution in your living space, soundproofing can significantly improve your quality of life. In this comprehensive guide, we’ll explore five easy yet effective soundproofing projects that you can tackle over the weekend, transforming your home into a peaceful oasis.
Table of Contents
Understanding Soundproofing Basics
Before we dive into the projects, let’s cover some soundproofing fundamentals. Soundproofing is all about reducing sound transmission through walls, floors, ceilings, and openings in your home. This section will explain the basics of sound transmission and introduce simple concepts like Sound Transmission Class (STC) ratings, which help measure how well a material blocks sound.
Project 1: Door and Window Sealing
One of the simplest and most effective ways to start your soundproofing journey is by sealing the gaps and leaks around your doors and windows. These are common areas where noise can easily infiltrate your home. This section will guide you through the process of identifying leaks and choosing the right materials for sealing, such as weatherstripping and acoustic caulk. You’ll learn step-by-step how to apply these materials effectively, ensuring a snug fit that blocks unwanted noise from entering your serene space.
QUIET CURTAINS™

Custom-made, laboratory tested, and field-proven STC sound blocking Quiet Curtains™ and Drapes block outside noise and light. STC Sound Blocking curtains work due to their inner linings. These linings are specialized; proprietary vinyl’s made exclusively for Quiet Curtains. The face fabrics used to construct the curtains have little impact on sound blocking.
- Blocks 15-20 dB depending on fabric and lining
- It reduces the volume of noise by about 60% (the highest tested curtain on the market).
- Three-layer heavy-duty construction
- Proprietary lining
Lab Tested Sound blocking up to 60%
Practical Tips: Applying Weatherstripping and Acoustic Caulk
To ensure optimal sound reduction, start by carefully inspecting all edges and corners of your doors and windows. Once you’ve identified the gaps, clean the surfaces thoroughly to ensure the materials adhere well. For weatherstripping, measure the perimeter of the door or window frame, cut the stripping to length, and apply it firmly along the edges. When using acoustic caulk, apply a continuous bead along gaps or joints, smoothing it out with a caulk tool or your finger (covered with a disposable glove) to ensure a tight seal. Emphasize the importance of covering all potential air leaks, as even the smallest gap can significantly reduce the effectiveness of your soundproofing efforts.
Sound sealing or weatherproofing for an air-tight seal
Airgaps need to be treated to ensure complete coverage and manage sound seeping in through the frame. It would be best if you did this on both sides and at the top of the frame. Weatherstripping requires little effort but, done properly; it’s an effective sound management method.
Most products use a peel-and-stick function. Surface preparation is required as the glue needs a clean area to ensure adhesion. An alcohol wash is not always required but is recommended. Installation should be done on the inner part of the frame.
You can use two methods for this:
Acoustic gasket
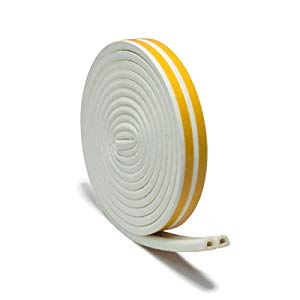
This is a foam rubber composite material that is a hollow “D” shape. When compressed, the gasket seals off and prevents airflow. If the gap is wide enough, you may end up with an air pocket which is just as effective as a soundproofing method.
Peel off the protective strip to expose the sticky side of the tape and then stick the gasket to the frame on all the edges as required.
Closed-cell foam
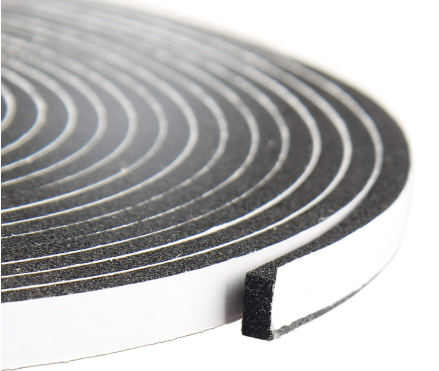
Acoustic-treated foam is the most commonly used material for this. It is compressed between the inner door frame and the door itself, preventing sound from traveling through.
Again peel-and-stick methods are commonly utilized for the application, which makes it easy to install.
Seal cracks and gaps around the frame
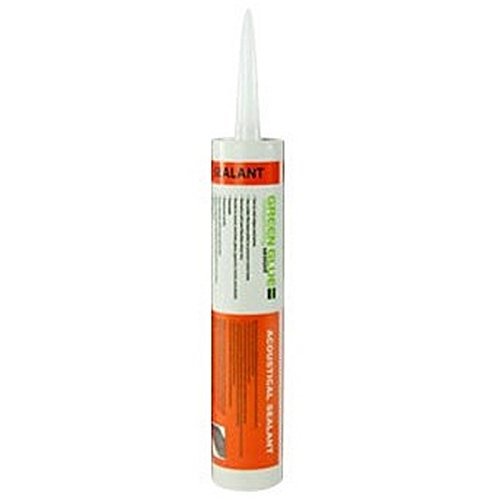
Air and sound may also leak through gaps around the frame, so sealing off this area is another “Must-do” step in the sound management process.
Caulking in a layer of Green-glue around the frame will effectively address this issue. A large caulking gun is needed, and applying to bead around the entire frame is recommended.
Once you have established an air-tight seal around the frame and there are no gaps around the frame itself, you can look at other areas to address.
Product Recommendations
For this project, I recommend using high-quality weatherstripping and acoustic caulk, which are specifically designed for soundproofing purposes.
To enhance your DIY journey, consider exploring additional resources such as our comprehensive guides on “How to Create a Soundproof Home Office” and “Top Soundproofing Materials Reviewed.” These articles provide deeper insights into soundproofing principles and offer reviews on the best materials to use for your projects.
Embracing Eco-Friendly Soundproofing Solutions
As the DIY community grows more environmentally conscious, the demand for sustainable soundproofing materials has surged. This section highlights eco-friendly options that don’t compromise on effectiveness, including recycled cotton acoustic panels and green glue soundproofing compounds. These materials not only offer excellent sound dampening properties but also contribute to a greener planet.
Product Insights:
- Noise Grabber Mass Loaded Vinyl (MLV): Celebrated for its superior sound barrier qualities and adaptable for various spaces.
- KILMAT 80 mil Car Sound Deadening Mat: A top choice in automotive insulation, reflecting the increasing interest in car soundproofing among DIY enthusiasts.
- Acoustical Caulk and Putty Pads: Key for sealing gaps with precision, enhancing the overall success of any soundproofing project.
These products represent the intersection of efficiency and environmental responsibility, making them ideal for your next soundproofing endeavor. Whether you’re outfitting a home studio or soundproofing your vehicle, these solutions ensure you can achieve your goals sustainably.
National Consumer Center offers you a chance to get a $500 gift card to Amazon. The payouts are quick, and you can use the Gift Card to pay for some of your Amazon products.
Project 1: Enhancing Your Home Study with Mass Loaded Vinyl

Check out my blog titled “How to Soundproof your Home Study” which provides a comprehensive, step-by-step guide on installing Mass Loaded Vinyl (MLV) to soundproof your home studio effectively. MLV is a dense, thin rubber that acts as an excellent sound barrier, making it perfect for reducing noise transmission.
You’ll start by measuring your studio’s walls, cutting the MLV to fit, and then using adhesive or mechanical fasteners to secure it in place. Special attention is given to sealing seams with acoustic sealant to ensure complete coverage.
Project 2: Car Soundproofing with KILMAT
Transform your vehicle into a serene haven with KILMAT sound-deadening mats. This project guides you through the steps of enhancing your car’s acoustic environment by applying KILMAT mats. Begin by cleaning the surface areas of your car’s interior where the mats will be applied, such as the floor, doors, and trunk. Measure and cut the mats to fit these areas, and then peel off the adhesive backing to secure them in place.
For optimal results, use a roller to ensure the mats adhere smoothly and evenly.
Project 3: Door and Window Soundproofing Solutions
To mitigate noise through doors and windows, start by identifying leaks. Use weather stripping for doors and foam tape for window frames to seal gaps. For larger gaps, acoustic caulk is effective. Install door sweeps to block sound under doors and use putty pads around window frames to absorb vibrations.
| Product | Effectiveness | Ease of Installation |
|---|---|---|
| Acoustic Caulk | High | Moderate |
| Weather Stripping | Medium | Easy |
| Foam Tape | Medium | Easy |
| Door Sweep | High | Moderate |
| Putty Pads | High | Challenging |

A door sweep is used to block out air and sound coming in through the bottom of the door. This can reduce up to 70% of the air and sound traveling in. Once the sides and top of the door are treated, you will need to ensure an air-tight seal at the bottom of the door.
You will need to install this at the bottom of the door to block air traveling through the gap. The ones made out of silicon are flexible, and aside from blocking out air and sound, they can also help insulate a room.
Advanced Tips and Tricks for the Avid DIYer
For those ready to elevate their soundproofing game, exploring advanced techniques and materials can offer significant improvements. Consider researching mass-loaded vinyl (MLV) installation between walls for enhanced sound blocking or delving into decoupling techniques to structurally separate surfaces and reduce sound transmission. Additionally, exploring the latest in sound-absorbing insulation materials can provide superior noise reduction capabilities.
Conclusion: Your Weekend Soundproofing Journey Begins
Now that you’re armed with a range of projects and advanced techniques, your DIY soundproofing journey is ready to commence. There’s immense satisfaction in transforming your space into a quieter, more serene environment. Whether you’re starting with simple door seals or diving into complex structural modifications, each project brings you closer to achieving the peaceful oasis you deserve.
Soundproofing your home
Ready to transform your living space into a sanctuary of peace and quiet? Dive into our essential guide to soundproofing your home! From selecting the right materials to easy DIY installation tips, we’ve got everything you need to block out unwanted noise and create the tranquil environment you’ve always dreamed of.
Find out more about soundproofing your home’s windows, doors, ceilings, and floors. Don’t let the buzz of the outside world disrupt your peace. Start your soundproofing journey today and enjoy the serene, noise-free home you deserve. Click here to unlock the secrets to a quieter home!
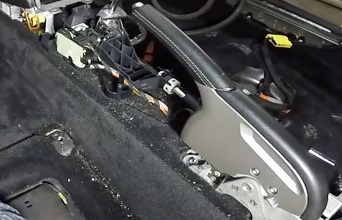
Sound travels through the sheet metal surfaces in your vehicle. Your floor covers the bulk of this. Sound damping this area will significantly reduce noise traveling through your car.
I’ve gathered this information by researching many different sources of information. Sometimes it isn’t easy to find helpful information, but I’m sure you’ll find this useful.
- Firstly remove the front and back seats, the center console, and the floor carpet of your car
- Then prepare the surface area
- After that, apply Dynamat
- Finally, reverse the steps of removal
Installing Dynamat on the floor of your vehicle will
- reduce engine noise
- reduce wind noise
- extend and improve the performance of your vehicle
- improve your car audio sound system (less noise for your car speakers to contend with)
The process for removing the carpet varies from vehicle to vehicle, so I’ve just looked at the most common setups. You’ll need to check your specific vehicle’s user manual and scrutinize the areas yourself.
You should check your car’s manual first. For around $20, you can find a detailed version. The easiest way to find the hard copy repair manual for your vehicle is to select Repair Manuals by Make and Model. Or you can get an electronic version. They both have all sorts of instructions and guides, whether it’s for customization, maintenance, repair, or even simply just learning about the inner workings of a particular vehicle.
What you’ll need
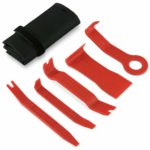
A panel removal tool kit is required for the panel pins. This is because they avoid breakage of the pins during the removal of them. It’s also useful for prying away the panels without doing damage to your vehicle’s paint job.
Aluminum tape is also needed. You can patch up the parts where there might be gaps left or use the tape to give your application a clean finish.

Wear a good pair of workman’s gloves while working with the material. The foil edges are sharp and cut through your skin. The glue is also best avoided.

You can use metal shears instead of scissors for products like Dynamat and others. You can also use a switchblade.
Use the correct seam sealer (if required) to avoid it setting and causing ripples on your trunk lid. In addition, the seam sealer should maintain some flex when dries.
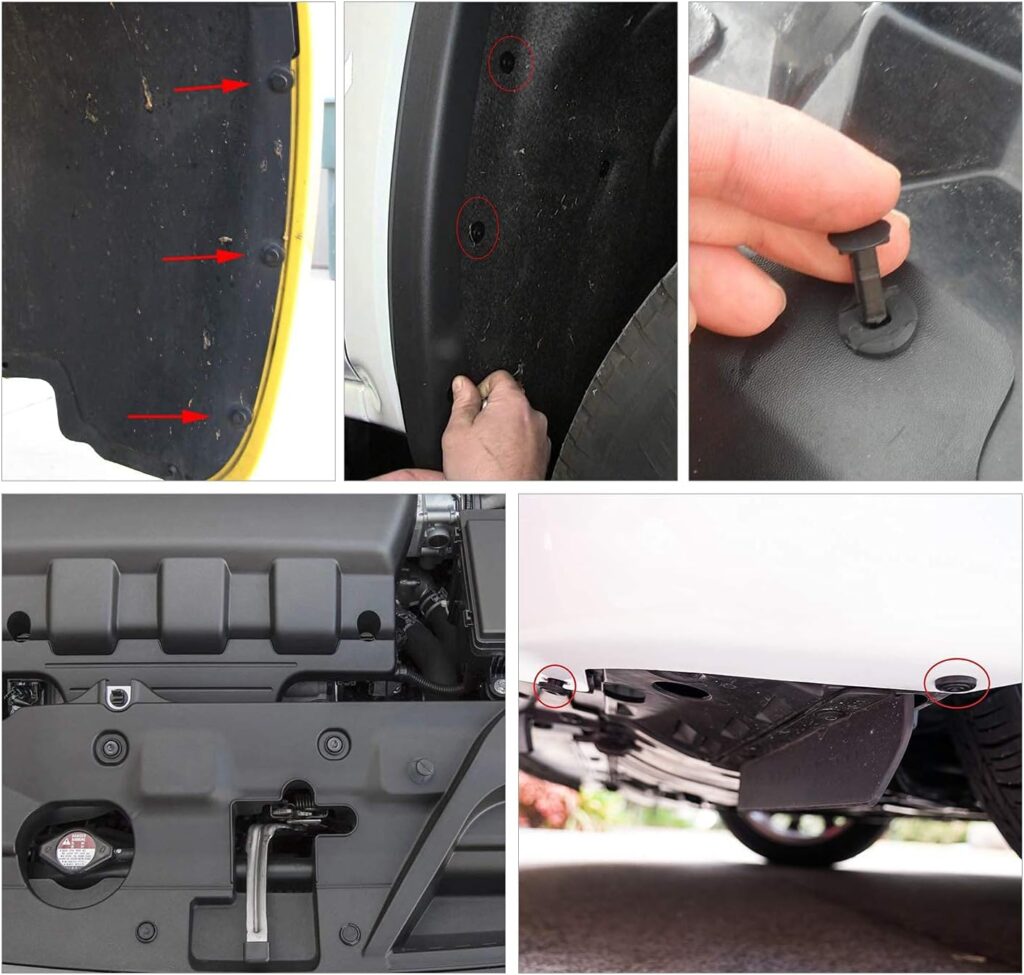
You may want to get a set of additional Bumper Retainer Clips, just in case you damage some or if you find a few missing already.
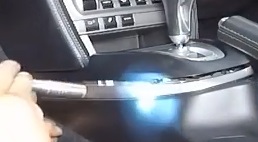
Use a portable light system to make it easier for you to see.
National Consumer Center offers you a chance to get a $500 gift card to Amazon. The payouts are quick, and you can use the Gift Card to pay for some of your Amazon products.
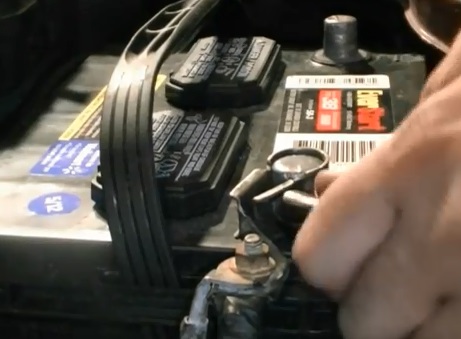
First things first
Start by disconnecting the battery to avoid damage to the airbag. Then remove all the items from the car. Lastly, prepare an area that you will use to keep the items you remove (Seats, console, etc.)

Removing the seats, belts, and trims
Front seats
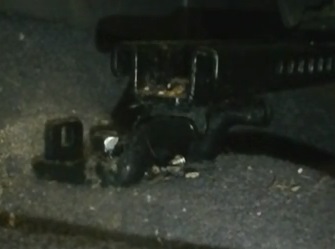
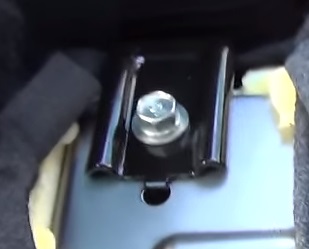
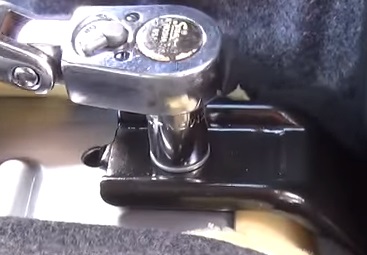
Begin by pushing the seat all the way back to access the two front bolts. You may find plastic clips covering these bolts. You may hold these clips in place with panel pins, but sometimes they have a screw keeping them in place. Then once the clips are off, you should see the bolt or bolts. Remove these bolts, then pull the seat as far forward as possible. Now the back of the seat may have up to 6 bolts (3 on either side). Again there may be clips concealing these bolts. Finally, following the same process, remove the bolts holding the back of the seat in place.
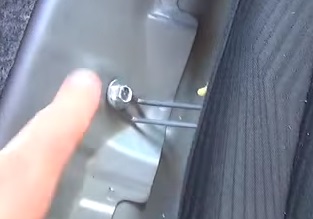
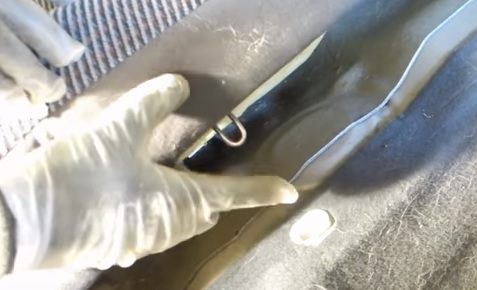
Front seat Safety belt
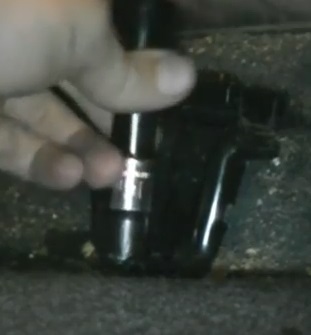
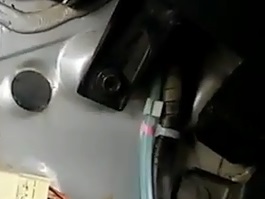
The safety belt anchor is attached to the bottom of the seat and will need to be removed first. It is usually concealed within a plastic cover. Remove the cover and the bolt.
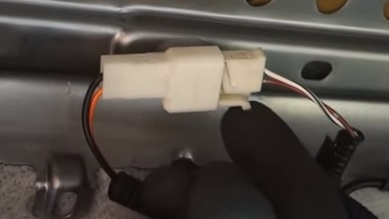
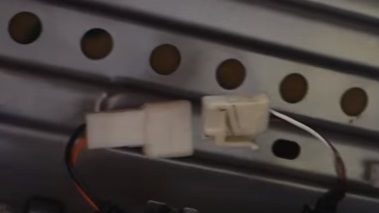
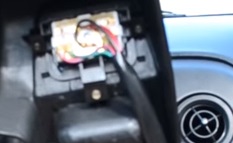
Front seat wiring
As mentioned in the beginning, you should have removed the battery terminal. If you lift the seat from the back, you should be able to see the wiring. Then carefully unplug the clamps that hold the wiring in place. The wires are held with a plastic clip to the bottom of the seat. Remove that carefully, then remove the seat through the front door.

Backseats
Cushion
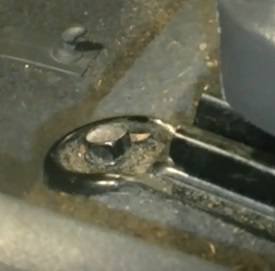
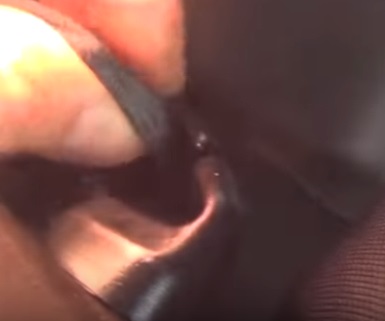
First, you may need to remove the bolts and/or screws holding the cushion in place. You’ll find bolts or a single bolt positioned in the middle of the seat. Use your hand to feel between the top half of the seat and the cushion. Removing this bolt will release the rear cushion pin. You may also find screws at the bottom of the cushion which need to be removed as well.
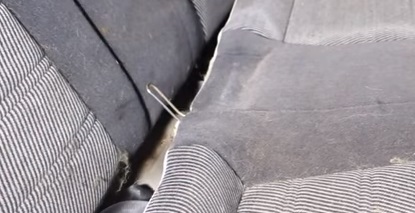
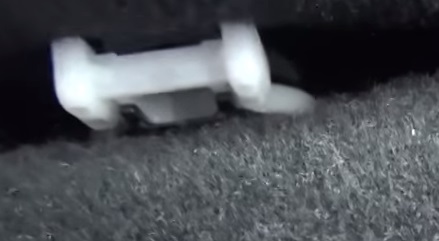
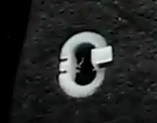
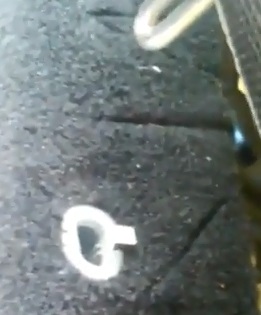
There is a pin at the back of the cushion and two pins in the front that lock the cushion in place. You can remove these pins from their corresponding slots. You’ll find these roughly in line with the middle of the passenger seat and the middle of the driver’s seat. Begin by lifting the cushion from the front.
You may need to use a lever to achieve this by placing it underneath the cushion and gently lifting the pins on either side. It would be best to release the pin at the back once you lift the seat up and forward. It’s not always required to remove the seatbelt anchor in this step. Lastly, thread the seatbelt clips through the cushion and remove the cushion from the car.
Top half
First, drop the seats forward, and you should find four bolts that release the top half of the backseats that need to be removed. Sometimes they’re covered by a carpeting trim. You may have to remove the plastic clips holding the trim in place first. Then remove all the bolts. Finally, you may need to remove the seatbelt from the guide to avoid it snagging.

Side cushion panels
Once you’ve removed the top half and cushion of the back seat, you may still have side cushion panels in place. These are fitted with a bolt at the bottom that releases them. Loosen these bolts, and you should be able to slide the panel up and out.
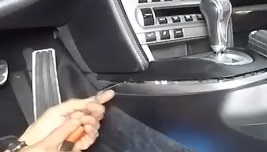
Centre console
Begin by removing the gear stick head unit. You can do this by unscrewing it, or you may find a release clip. After that, remove the gear stick cover. You may need to shift the gear stick around to achieve this. Use a flashlight to see where the pins are holding.
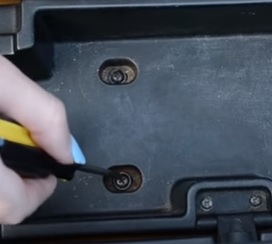
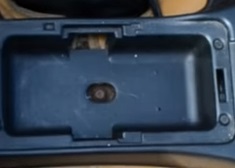
Next, remove the plastic or rubber matting in the armrest compartment and cup holders. There should be a set of screws or bolts underneath that need to be removed.
Underneath the handbrake should also be a set of screws usually covered by a clip. Using the trim removal kit, take off the clip and loosen the screws.
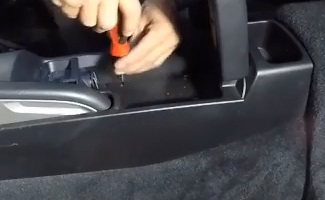
Then check the side and back of the armrest compartment for bolts or screws. If you have a cupholder, this should be removed, which may reveal another set of screws. The sides of the front part of the console also may have plastic clips or screws. Remove all of these as well.
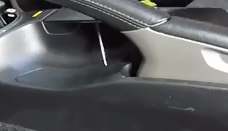
After that, the plastic/rubber housing around the gear stick should clip off, revealing another set of screws. This part will need patience as you will need to move the console around until you find the right angle to remove it. Finally, you should be able to unclip the console and remove it entirely from the car.

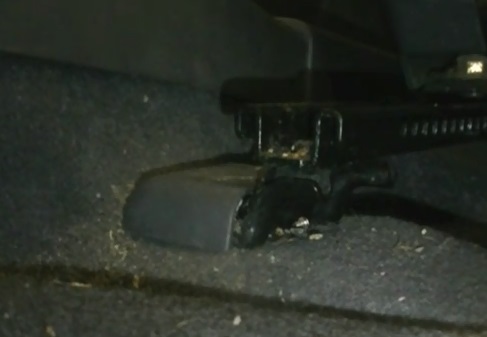
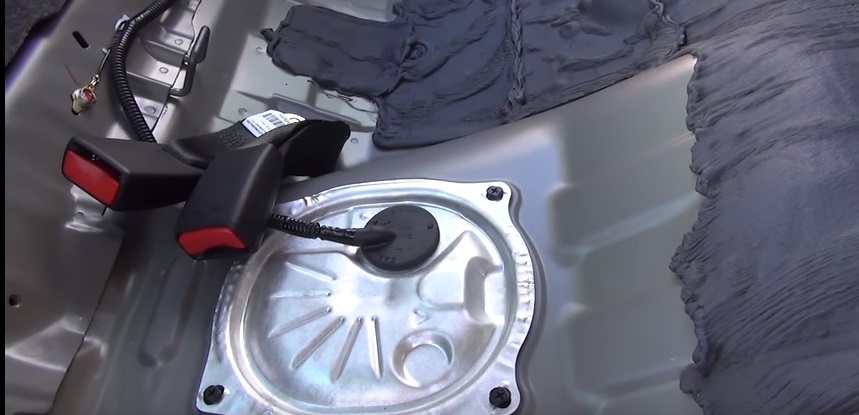
Seatbelt
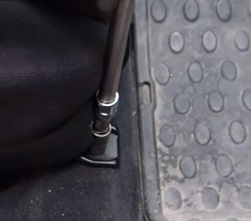
It’s usually not required to remove the backseat safety belts. The front seat safety belts are anchored to the floor. There should be another plastic clip covering a bolt. Remove these.
Plastic/Metal trimming
Some of the side trims or kickboards will need to be removed to get to your car flooring. You will need to inspect the panels first. Sometimes you’ll find the weather stripping covering the panel. This needs to be removed.
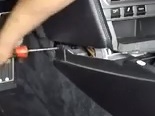
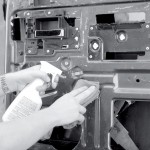
First, check for any exposed screws holding the trim in place and remove these. If you do not find screws check the panel to see where the clips are positioned by moving it around a little to establish the pressure. At the pressure point, you should find the clip underneath the panel. Then using the panel removal tool, slide the head under the panel and gently push down on the lever to lift it. Do this around all the door frames (Where the carpet is being held in place). Finally, if needed, unplug all the wiring carefully.
Using the proper tool here will avoid you breaking the panel pins which you need when replacing everything.
You may also find a pedal plate holding the carpet in place, which needs to be removed by loosening the bolts.
Rear deck
Adding Dynamat to the rear deck will improve the sound quality of your car speakers. However, this is not required to remove with a floor installation. You may want to consider it while you’re at it.
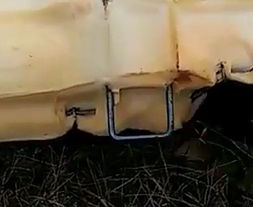
Removing the flooring carpet
If you followed the steps above, you should be ready to remove the carpet. Do a last check to ensure the carpet is loosened from all clips, screws, and bolts. If this is the first time you’re removing the carpet, you may find the foam sticking to the carpet and the car floor.
The best way to remove the carpet is to roll or fold it as you go along. Start from the front under the steering wheel where the pedals are. Then move to the front passenger side and then up to the gear. These are the trickiest areas to get out. Next, thread through all the wiring carefully. Once you’re done in the front, your carpet should be folded or rolled halfway. Then continue rolling the carpet up to the back seat. Finally, remove it completely from the back car door. You may want to give it a good dusting and vacuum it whilst it’s out.
Preparing the floor surface
The surface area needs to be cleaned before you apply the Dynamat. First, use a vacuum to remove any loose dirt. Then use a cloth with rubbing alcohol to clean off any oil and grease marks.
Installing DynaMat
The best product for this project is Dynamat Extreme. Dynamat Extreme is a sound damping material and comes in 36 Sq. Ft (9 X 18″ X32″). It is designed to reduce resonance and vibration on metal surfaces which in turn reduces road noise. For a more effective solution, you would want to add a layer of sound deadening material. Dynamat offers DynaPad, a Dynamat sound deadening material that can be placed on top of the Dynamat Xtreme (amongst some forums, they go as far as recommending two layers of Dynamat and then Dynapad). This will all depend on your requirements and whether or not you have space under your carpet.
Damping material and comes in 36 Sq. Ft (9 X 18″ X32″). It is designed to reduce resonance and vibration on metal surfaces which in turn reduces road noise. For a more effective solution, you would want to add a layer of sound deadening material. Dynamat offers DynaPad, a Dynamat sound deadening material that can be placed on top of the Dynamat Xtreme (amongst some forums, they go as far as recommending two layers of Dynamat and then Dynapad). This will all depend on your requirements and whether or not you have space under your carpet.
See the detailed installation guide of Dynamat
Re-installation
Follow the steps of disassembly.
Conclusion
By applying Dynamat to your car floor, you may find other areas becoming weak points, and you might want to address them also. Your car’s door panels should be the next to be addressed and then your trunk area. See my post on Car Door Damping DIY and How to soundproof your trunk.
So whether you have a hot rod or just your regular family car, installing Dynamat will afford you a more quiet journey.
Good luck and happy soundproofing!
Good luck and happy soundproofing!